Last updated on March 4th, 2020
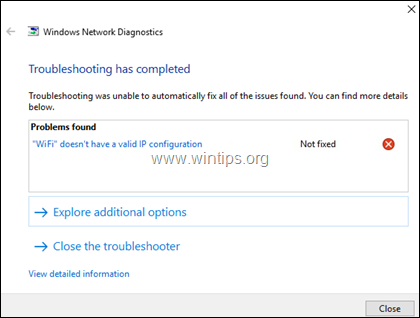
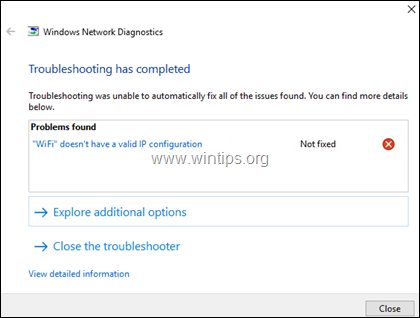
If you cannot connect to your Wi-Fi network and after running the network troubleshooter you get the error message “WiFi doesn’t have a valid IP configuration”, then continue reading below to fix the problem.
This tutorial contains instructions to resolve the “WiFi doesn’t have a valid IP configuration” error on Windows 10/8 or 7 OS.
How to FIX: WiFi doesn’t have valid IP configuration
There are couple of solutions to resolve the “Wi-Fi doesn’t have valid IP configuration” problem, so if you try one solution and it doesn’t work, don’t lose hope, just try the others.
Solution 1: Reset TCP/IP parameters.
Solution 2: Renew IP address.
Solution 3. Refresh IP Address and Reset DNS Address settings.
Solution 4. Uninstall/Reinstall the Wireless Adapter Driver.
Solution 5. Update Wireless adapter drivers.
Solution 6. Set WLAN Autoconfig Service to Automatic.
Solution 7. Specify a static IP Address.
Solution 1: Reset TCP/IP parameters.
The “Wi-Fi doesn’t have valid IP configuration” error message commonly means that your TCP/IP settings have improperly configured. So, the first way to resolve the Wi-Fi connection problem is to reset the TCP/IP using the “netsh” command.
1. Open command prompt as administrator. To do that:
1. In the Search box type: cmd or command prompt
2. Right click on the command prompt (result) and select Run as Administrator.
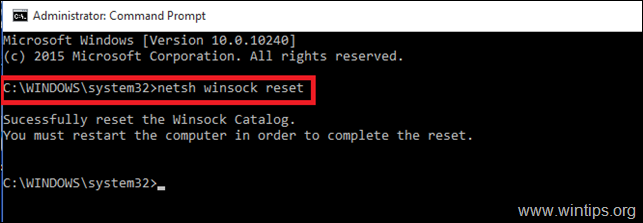
3. At command prompt, type the following command and press Enter.
- netsh winsock reset
4. Then type the following command and press Enter.
- netsh int ip reset
5. Close the command prompt window and restart your computer.
Solution 2: Renew IP address.
1. Open command prompt as administrator.
2. After the command prompt opens, type the following command and hit Enter. *
- ipconfig /release
* Note: you must put a space between ipconfig and /release
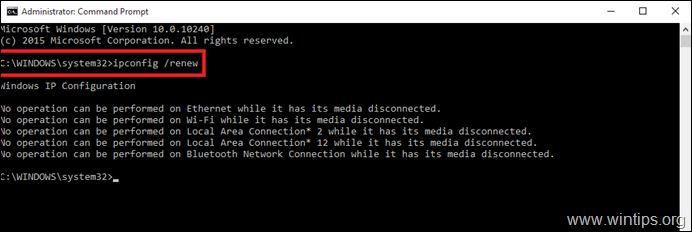
3. Then type: *
- Ipconfig /renew
* Note: you must put a space between ipconfig and /renew.
4. Close the command prompt window and restart your computer.
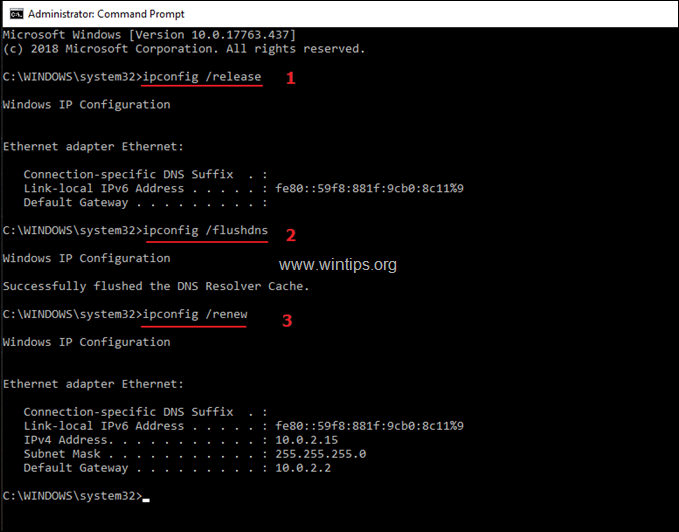
Solution 3. Refresh IP Address and Reset DNS Address settings.
1. Open an elevated command prompt.
2. In the command prompt window, type the following three (3) commands in order (press Enter after typing each of them).
-
- ipconfig /release
- ipconfig /flushdns
- ipconfig /renew
3. Close command prompt and restart your computer.
Solution 4. Uninstall and Reinstall the Wireless Adapter Driver.
The error “WiFi doesn’t have a valid IP configuration” can be caused by faulty network driver. So, proceed to uninstall the wireless adapter driver and then let the Windows to reinstall it automatically the next time you restart your system. To uninstall your Wi-Fi network driver, follow the steps below:
1. Navigate to Device Manager. To do that:
1. Press Windows
+ “R” keys to load the Run dialog box.
2. Type devmgmt.msc and press Enter to open the device manager.
2. In device manager, expand the Network adapters.
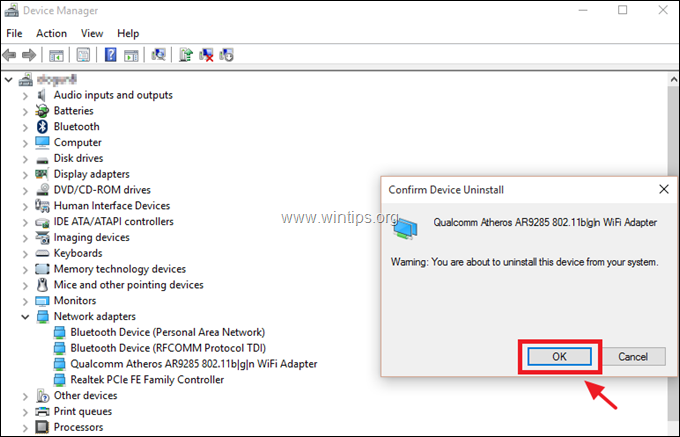
3. Right click on the Wireless adapter and choose Uninstall.
4. Mark the checkbox “Delete the driver software for this device” (if it appears) and click OK on the confirmation window.
5. Restart your PC.
6. After restart let Windows to reinstall the WiFi driver and then try to connect to Internet. *
* Note: If Windows doesn’t install the drivers automatically, continue to next solution.
Solution 5. Update Wireless adapter drivers from Manufacturer’s site.
1. Download the latest driver for the Wi-Fi adapter from manufacturer’s support site. To download the driver, use one of the following options:
a. Connect your PC to Internet via the Ethernet Adapter (LAN Cable), or…
b. Download the driver, from another working computer and use a USB drive to transfer the driver on the PC with the Wi-Fi error.
2. If the driver, comes on an “.exe” file, then run it to install the driver, otherwise use the device manager to install the driver. To do that:
1. Navigate to Device Manager.
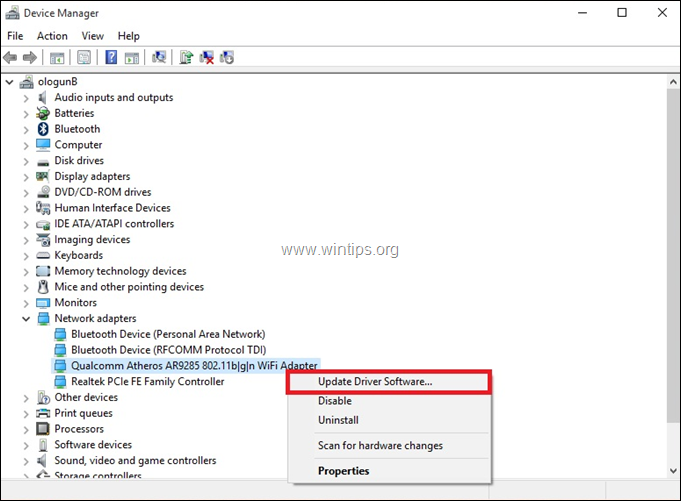
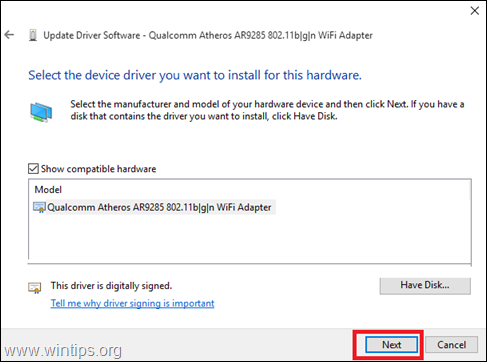
2. Right click on the Wireless adapter and choose Update Driver Software.
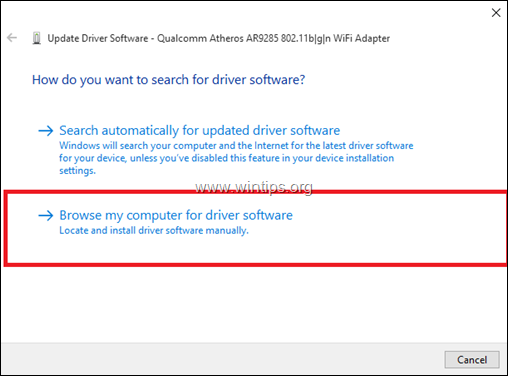
3. Choose Browse my computer for driver software.
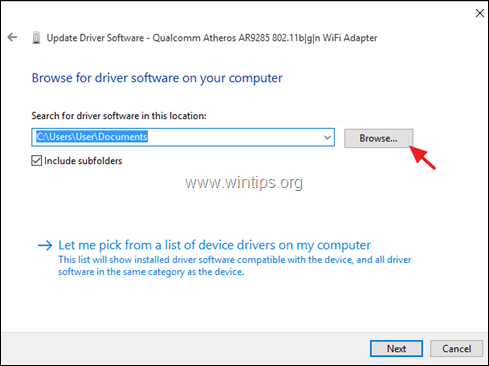
4. Click Browse and choose the location (folder) of the downloaded driver.
5. If Windows can found an updated version of the driver, click Next to install it.
6. When the driver installation is completed. restart your computer.
Solution 6. Change WLAN Autoconfig Service to Automatic.
1. Navigate to Services control panel. To do that:
1. Simultaneously press the Windows
+ R keys to open run command box.
2. In run command box, type: services.msc and press Enter.
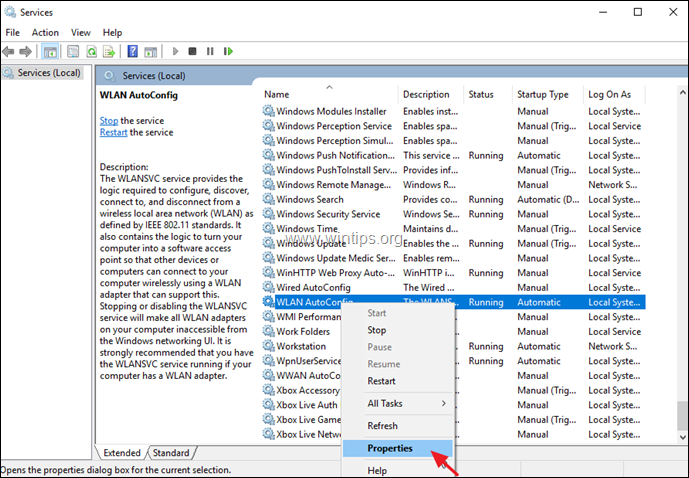
2. Scroll down, right click at WLAN AutoConfig service and select Properties.
3. In the properties menu, make sure that the Startup type is Automatic and the service is running. (If not, change the Startup to “Automatic”, click apply and then click the Start button.)
4. Restart you PC and then check if the problem has resolved.
Solution 7. Specify a static IP Address.
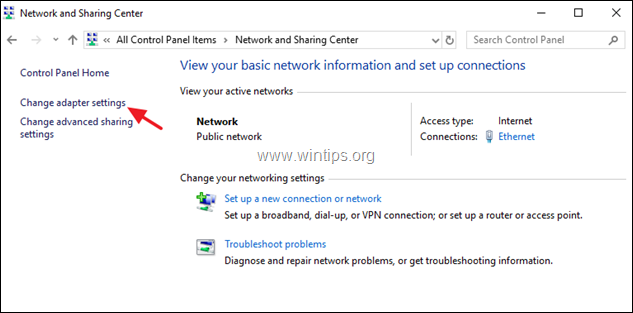
1. Navigate to Control Panel > Network and Sharing Center.
2. Click Change adapter settings on the left.
3. Right click at the Wi-Fi Network Connection and choose Properties.
4. Then select the ‘Internet Protocol Version 4 (TCP/IPv4)‘ and click Properties again.
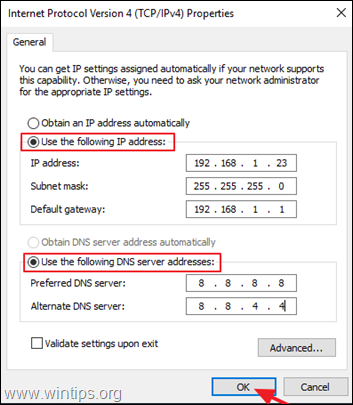
5a. Select the option to Use the following IP address and enter the following:
- IP address: 192.168.1.x (You can use any number to represent x. If you are unsure, use 192.168.1.23).
- Subnet mask: 255.255.255.0
- Default Gateway: 192.168.1.1.
5b. Then select Use the following DNS server addresses and type the following Google DNS Server addresses:
- 8.8.8.8
- 8.8.4.4
5c. When done, click OK and then Close.
6. Restart your computer.
That’s it! Which method worked for you?
Let me know if this guide has helped you by leaving your comment about your experience. Please like and share this guide to help others.
do earn a commision from sales generated from this link, but at no additional cost to you. We have experience with this software and we recommend it because it is helpful and useful):



![image_thumb[22] image_thumb[22]](https://techprotips.com/wp-content/uploads/2020/03/echo/image_thumb22_thumb-2.png)

