Last updated on July 21st, 2020
This tutorial contains step by step instructions to migrate vCenter Server on Windows to VCSA 6.7. Recently VMware announced that vCenter version 6.7, would be the last version of vCenter on Windows, and it is highly recommended to migrate all the Windows vCenter Server instances to the VCSA (vCenter Server Appliance) on a ESXi host.
As you may know, the first releases of VCSA who were based on SUSE Linux, lacked some critical features that were supported on Windows vCenter Server installations. Since then, VMware has made a lot of improvements, with the most recent release of VSCA having more features and capabilities compared to the vCenter Server.
Some of these features include native vCenter High Availability, a file-based backup and restore unified update and patching, and significant performance enhancements. Furthermore, the VCSA is now running on VMware’s own Photon Linux OS, which allows VMware to provide better support and feature and security enhancements since they owns the whole product.
The migration of vCenter Server from Windows to VCSA, has been significantly simplified to allow for a smooth transition between the two platforms. The built-in migration tool allows customers to deploy the VCSA and import data from the Windows vCenter Server. It provides an estimate of the time required to import all the data depending on performance and historical data size in your environment. The tool also supports the use of custom ports for your vCenter Server.
The migration is a 2-stage process with the following steps:
1. Stage 1 – Deploys a new VCSA appliance.
2. Stage 2 – Migrates source windows Server to target VCSA by copying all the selected data.
In this article are mentioned all the required steps for migrating VMware vCenter Server 6.0 or 6.5 on Windows, to vCenter Server Appliance VCSA 6.7. *
* Note: VMware provides supported paths for migrating from vCenter Server version 6.0 and version 6.5 installations on Windows to vCenter Server Appliance 6.7installations. You can migrate the following deployments:
| Source Configuration | Target Configuration |
| vCenter Server 6.0 with an Platform Services Controller embedded instance on Windows vCenter | vCenter Server Appliance 6.7 with an embedded Platform Services Controller appliance |
| . | |
| vCenter Server 6.5 with an embedded Platform Services Controller instance on Windows | vCenter Server Appliance 6.7 with an embedded Platform Services Controller appliance |
| . | |
| Platform Services Controller 6.0 instance on Windows | External Platform Services Controller 6.7 appliance |
| . | |
| Platform Services Controller 6.5 instance on Windows | External Platform Services Controller 6.7 appliance |
| . | |
| vCenter Server 6.0 instance on Windows | vCenter Server Appliance 6.7 with an external Platform Services Controller appliance |
| . | |
| vCenter Server 6.5 instance on Windows | vCenter Server Appliance 6.7 with an external Platform Services Controller appliance |
How to Migrate Windows VMware vCenter Server to VCSA 6.7
Before beginning to migrate vCenter Server to VCSA, complete the following preparation tasks:
1. Take a backup of the vCenter Server on Windows, in case anything goes wrong during the migration.
2. Synchronize the clocks between all machines that running all the vCenter Server services. (See Synchronizing Clocks on the vSphere Network.)
3. If you are using the FQDN, ensure that the workstation you are using to launch the migration and the target ESXi/vCenter is on the same DNS server.
4. Verify that the DHCP is not used in the vCenter Server and in the Platform Services Controller (PSC).
5. ESXi hosts must be at version 6.0 or greater. If your ESXi hosts are version 5.5 or earlier, upgrade them to 6.0 or 6.5.
6. Prepare vCenter Server Databases for Migration.
7. If you want to keep your current SSL certificates, back up the SSL certificates that are on the vCenter Server system before you upgrade to vCenter Server 6.7. (See Prepare Managed ESXi Hosts for Migration).
Step 1. Download and Run VMware Migration Assistant on the source vCenter Server on Windows.
1. Download the VCSA 6.7 ISO image file from the VMware product download website.
2. Mount the downloaded VCSA ISO file on the Windows vCenter Server that you want to migrate.
3. Explore the contents of the “migration-assistant” directory, and double-click to run the VMware-Migration-Assistant.exe.

4. The “VMware-Migration-Assistant.exe” initiates a pre-migration check to verify that you have met all the requirements for the migrate. {During the check, you will be asked to enter your SSO domain credentials (username & password)}.
5. When the check is completed, you ‘ll see the “Waiting for migration to start…” message on the screen. When this done, continue to step-2.

Step 2. Migrate VMware vCenter Server to VCSA.
1. Navigate to your Windows computer (or Server)*, and download again (or copy from the Windows vCenter Server), the VCSA 6.7 ISO image.
* Note: You can run the vCenter Server Appliance GUI or CLI installer from a network client machine that is running on a Windows, Linux, or Mac operating system.
2. Mount the “VCSA 6.7 ISO” image and navigate to “vcsa-ui-installerwin32” directory.
3. Right click at “installer.exe” and select Run as Administrator.
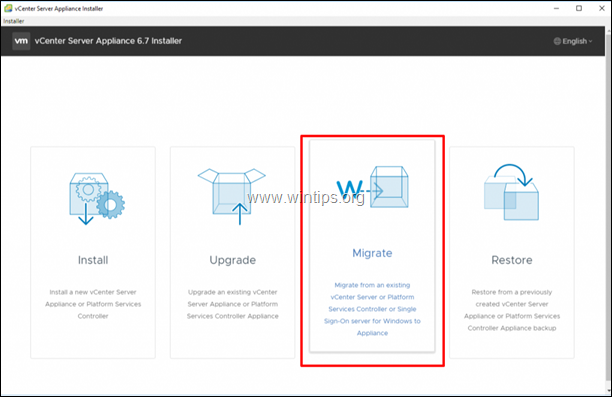
4. Click Migrate to begin.

5. At the next screen, click Next to continue. *
* Note: The migration is a 2-stage process which does the following:
-
- Stage 1 – Deploys a new VCSA appliance.
- Stage 2 – Migrates source windows server to target VCSA by copying all the selected data.

6. Accept the End user license agreement then click Next.

7. At the next screen:
a. Type the FQDN or the IP Address of the source Windows vCenter Server that you want to migrate.
b. Then type the SSO administrator username and the SSO password.
c. When done, click Next.

8. Now enter the details for the target environment, which is, the IP address or the DNS name of the ESXi host where you want to deploy the VCSA and the password for the root user on the ESXi host, and click Next to continue.

9. Now, type the name for the VSCA appliance VM and the password for the root account and click Next.

10. At the next screen, select the deployment size for our VCSA. The installer provides different options. Choose the one that corresponds to the number of hosts and virtual machines you have in your infrastructure and click Next.

11. Now select the datastore for storing the appliance and click Next to continue. *
* Note. If you wish to use a thin provisioned disk, then select “Enable Thin Disk Mode“.

12. At the next screen, enter all the required network details for the appliance (IP Address, FQDN, Gateway and DNS), and click Next to continue.

13. Click Finish on the last screen to begin deploying the VCSA.
14. Wait until the deployment process is complete.

15. Once the VCSA has been deployed successfully, click Continue to begin the stage 2 of the migration.

16. At the “Connect the Source vCenter Server” screen, type the administrator username and the password of the vCenter Server for Windows that you want to migrate, and click Next to continue.

17. If the Windows vCenter Server is joined to an Active Directory domain, you would be required to enter the administrator credentials for your AD, to join the target VCSA to your AD domain.

18. Select the data you wish to migrate from the source vCenter Server on Windows and click Next.

19. On the final step, you will get a warning informing you of shutting down the source vCenter server once the network on the destination server has been configured. Click OK to continue.

20. When the migration of the data is completed, click close.

21. That’s it. Open your browser and enter the IP/FQDN of the vCenter Server Appliance.

That’s it! Let me know if this guide has helped you by leaving your comment about your experience. Please like and share this guide to help others.

do earn a commision from sales generated from this link, but at no additional cost to you. We have experience with this software and we recommend it because it is helpful and useful):
Full household PC Protection – Protect up to 3 PCs with NEW Malwarebytes Anti-Malware Premium!