Last updated on December 16th, 2019
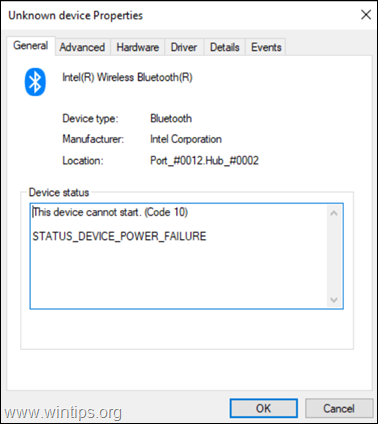
On a customer’s HP laptop with Windows 10, the following error appears in device manager: the Intel Wireless Bluetooth was marked with an exclamation mark and at the device properties, the following error appeared: “This Device Cannot Start (Code 10) – STATUS_DEVICE_POWER_FAILURE”.
The problem “STATUS_DEVICE_POWER_FAILURE” with error Code 10, on the Intel Bluetooth adapter, appeared after a installing a Windows Update and the problem was not resolved, even after rolling back the last update.

In this tutorial you’ll find step by step instructions, on how to resolve the Device Manager error “Device Cannot Start (Code 10) / STATUS_DEVICE_POWER_FAILURE” on Intel Bluetooth Adapter, on Windows 10 OS.
How to FIX: Intel Bluetooth Adapter Cannot Start (Code 10) – STATUS DEVICE POWER FAILURE.
Method 1. Install the latest driver for the Intel® Wireless Bluetooth Adapter.
1. Uninstall the current version of Intel Wireless Bluetooth Software.
2. Then uninstall the Intel Wireless Bluetooth Adapter. To do that:
1. Press Windows
+ “R” keys to load the Run dialog box.
2. Type devmgmt.msc and press Enter to open the device manager.
![image_thumb[22]_thumb](https://www.wintips.org/wp-content/uploads/2019/05/image_thumb22_thumb-1.png "image_thumb[22]_thumb")
3. Right click on the Intel Wireless Bluetooth adapter and select Uninstall device.

3. Now, according to your Windows 10 version (32 or 64 bit), proceed and download the latest driver for Intel® Wireless Bluetooth Adapter.
4. When the download is completed double click at the downloaded file and follow the on screen instructions, to install the drivers.

5. When the installation is completed click Finish and restart your PC.
6. After restart, check if the “STATUS_DEVICE_POWER_FAILURE” on Intel Bluetooth device, has resolved. If the problem persists, continue to next method.
Method 2. Install the latest Intel Wireless Bluetooth Drivers by using the Intel® Driver & Support Assistant
1. Download the install the Intel® Driver & Support Assistant.
2. When the installation is completed, press the Start Scan button and let the program to detect and find the latest drivers for your Intel devices.

3. After scan, Download the drivers found.

4. Finally press Install and follow all the prompts, to install the latest Intel drivers found and restart your computer.

Method 3. Install the Generic Bluetooth Adapter Driver.
1. Navigate to Device Manager.
2. Right click on the Intel Wireless Bluetooth adapter and select Update driver.

3. Click Browse my computer for driver software and then choose Let me pick from a list of available drivers on my computer

4. Uncheck the Show compatible hardware checkbox and select Generic Adapter > Generic Bluetooth Adapter and click Next.

5. When the installation is completed click Finish and restart your PC.
6. After restart, check if the problem with the Bluetooth has resolved. If the problem persists, continue to next method.
Method 4. Disable Fast Startup and Uninstall/Reinstall Bluetooth drivers.
1. Navigate to Control panel, change the View By (at the up right) to Small icons and then click Power Options.

2. At the left pane, choose Choose what the power buttons do.

3. Click Change settings that are currently unavailable.

4. Scroll down and uncheck the Turn on fast startup (recommended) option and click Save changes. *
* Note: If the “Turn on fast startup (recommended)” option is missing from this window, then you have to enable Hibernation on your computer.

3. Navigate to Device Manager and Uninstall the Intel Wireless Bluetooth Adapter.
4. When the uninstall is completed, shut down your computer.
5. Power on your PC again and let Windows to automatically install the Bluetooth drivers.
Method 5. Change Power Settings for Wi-Fi & Bluetooth Adapter(s).
1. Open Power Options in Control Panel.
2. Click Change plan settings (next to “Balanced”).

3. Select Change advanced power settings.

4. Scroll down to find and expand the Wireless Adapter Settings.
5. Now set the “On Battery” and “Plugged in” setting to Maximum Performance.

6. Reboot your computer.
Method 6. Roll back Windows 10 to the Previous Version (Build).
If the “Device Cannot Start (Code 10) – STATUS_DEVICE_POWER_FAILURE” issue, appears after installing a Feature Windows 10 Update, rollback your system to the previous version. To do that:
1. From Start menu choose Settings > Update and security.
2. At Recovery options select the Get Started button under the Go back to an earlier build section. *
* Note: If the Get Started button, is greyed out then continue to the next method.

3. Follow the onscreen instructions to restore Windows 10 to the previous build.
Method 7. Restore Windows 10 to an earlier working state.
If the Intel Wireless Bluetooth device worked properly before, then restore your system to a previous working state: To do that:
1. Simultaneously press the Windows ![]() + R keys to open the ‘Run‘ command box.
+ R keys to open the ‘Run‘ command box.
2. In run command box, type rstrui and press Enter.

5. Click Next at the first screen.
6. Select a previous restore point and click Next again.

7. Follow the onscreen instructions to start the restore process.
8. After System Restore, proceed and check if the problem has resolved.
Method 8. Repair Windows 10 with an in-place Upgrade.
Another method that usually can fix many problems in Windows 10, is to repair Windows with an in-place upgrade. For that task follow the detailed instructions at this article: How to repair Windows 10 with an in-place upgrade.
Method 9. Perform a Clean Windows 10 installation.
Many times, it is better and less time consuming to backup your files and to RESET your PC or to perform a clean Windows 10 installation, than to try to resolve problems in Windows 10.
That’s it! Which method worked for you?
Let me know if this guide has helped you by leaving your comment about your experience. Please like and share this guide to help others.

do earn a commision from sales generated from this link, but at no additional cost to you. We have experience with this software and we recommend it because it is helpful and useful):
Full household PC Protection – Protect up to 3 PCs with NEW Malwarebytes Anti-Malware Premium!