Last updated on December 30th, 2019
In this tutorial you will find detailed instructions on how to use a different drive as the backup destination in File History in Windows 10.
In a previous tutorial I mentioned the way to automatically back your personal files from Documents, Pictures, Music, Videos and Desktop folders. If you ‘re already using the File History feature to back up your files and you want to use another drive as the backup destination, then read this tutorial to learn how to do that.
How to Select a Different File History Drive.
To change the File History drive:
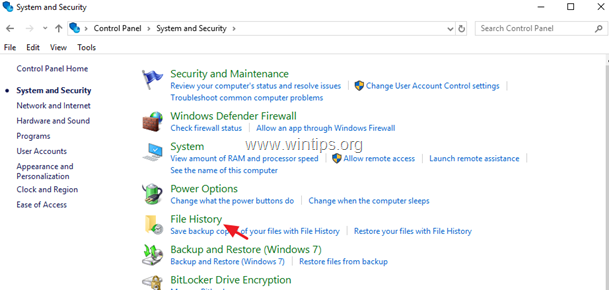
1. Navigate to Control Panel -> System and Security -> File History.

2. At the left pane, select Select Drive.

3. Now choose the drive that you want to use from now on, as the File History backup drive and click OK.

4. Then click Yes to confirm your decision.

5. You ‘re done! From now on, the File History backup tool, will use the new drive as the backup destination to copy you files. *
* Note: Keep in mind, that after you select the new drive, the stored data on the old File History drive wouldn’t be deleted (the backup remains on the old drive). If you want to permanently remove the ‘File History’ backup from the old File History drive, explore the contents and delete the “FileHistory” folder.

That’s it! Let me know if this guide has helped you by leaving your comment about your experience. Please like and share this guide to help others.

do earn a commision from sales generated from this link, but at no additional cost to you. We have experience with this software and we recommend it because it is helpful and useful):
Full household PC Protection – Protect up to 3 PCs with NEW Malwarebytes Anti-Malware Premium!