,
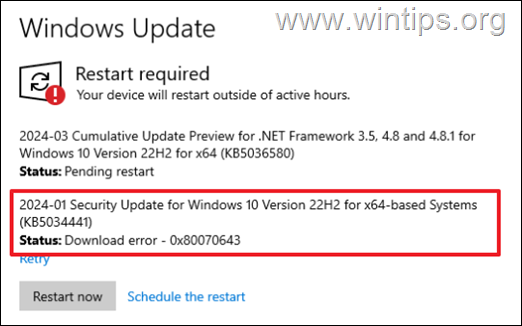
Since January 9, 2024, when Microsoft released KB5034441, many other users report that it cannot be installed with error 0x80070643. Since I too have encountered error 0x80070643 many times while trying to install update KB5034441, I decided to write my experience and the most functional solutions to solve the problem.


According to Microsoft, the error 0x80070643 occurs because the update KB5034441 requires 250MB of free space on the recovery partition to install successfully, and the recommended solution is to manually increase the size of the recovery partition.
But, from my experience with this error in several computers, the suggested solution usually doesn’t solve the problem, because:
- The error 0x80070643 in KB5034441 still occurs when the recovery partition has the required 250 MB of free space.
- The error 0x80070643 in KB5034441 still occurs even after increasing the recovery partition by 500 MB or 1024 MB (1 GB) or more.
- The error 0x80070643 in KB5034441, appears even after reinstalling Windows (clean install).
In this tutorial you’ll find three (3) working solutions to solve the error 0x80070643 in KB5034441 update.
How to FIX Download Error 0x80070643 in KB5034441 Update on Windows 10.
Solution 1. Hide KB5034441 Update.
Based on my observations above and my testing so far, I’ve come to the conclusion that this particular update has a bug that Microsoft hasn’t fixed yet (e.g. with any newer update), and the best way to deal with the error 0x80070643 is to not install and bypass (hide) this problematic update. To do that:*
* Note: If you don’t want to hide the update, continue to next solutions.
1. Download and then run Microsoft’s Show or hide updates tool.
2. Click Next on first screen and then click Hide updates.


3. Check the KB5034441* update and click Next.
* 2024-01 Security Update for Windows 10 Version 22H2 for x64-based Systems (KB5034441)


4. When for the operation to complete, then click Close and you’re done!
Solution 2. Fix error 0x80070643 by updating Windows.
The most working method to fix the error 0x80070643 in KBKB5034441, is to update Windows 10 using the Media Creation Tool.
1. Go to Windows 10 download site and click Download Now under “Create Windows 10 installation media“.


2. When the download is completed, close all open programs and double-click at MediaCreationTool22H2.exe to run it.


3. Accept the License Terms at the first screen and then click Upgrade this PC now and click Next.


4. At Ready to install screen, ensure that the “Keep personal files and apps” is checked and click Install.


5. The Windows installation process will begin. Wait until the installation is complete and do not interrupt it until your system reboots to the desktop.
6. When it does, go to Windows Update center and check if there are any other updates available to install. If so, let Windows to install them and you’re done!
Solution 3. Increase Recovery Partition’s size.
If the above method does not resolve the error 0x80070643 in KB5034441, then see if increasing the size in the recovery partition (as Microsoft suggests), resolves the issue.
Step 1. Find out the Size of the Recovery Partition.
1. Press the Windows ![]()
![]() + R keys to open the ‘Run‘ command box.
+ R keys to open the ‘Run‘ command box.
2. In run command box, type diskmgmt.msc and press Enter to open Disk Management.


3. In Disk Management, notice the size of the Recovery Partition (e.g. “625 MB” in this example)


4. Close Disk Management and proceed to next step.
Step 2. Increase the size of the recovery partition.
1. Download and install the free edition of MiniTool Partition Wizard.
2. Close all running programs and open the MiniTool Partition Wizard.
3. At the main screen, locate the Recovery partition from its size (e.g. “625 MB” in this example), and then select it and click Extend Partition on the left pane.


4. At the Extend Partition screen, drag the slider to the left and then adjust it to take at least 250 MB free space from drive C: (e.g. “411,23” MB in this example). When done, click OK.


5. Click Apply and then click Yes to apply the change.


6. When prompted, click Restart Now to reboot the computer and complete the partition resizing.


7. After restarting Mini Partition Wizard it will start resizing the partitions. Let the process finish and do not turn off the computer. When the process is complete, your computer will restart automatically and boot to Windows.
8. After entering Windows try to install the KB5034441 again.
That’s it! Which method worked for you?
Let me know if this guide has helped you by leaving your comment about your experience. Please like and share this guide to help others.
