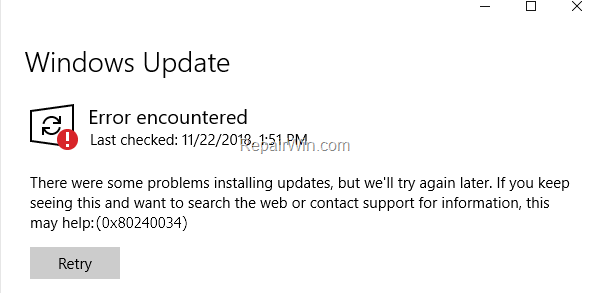
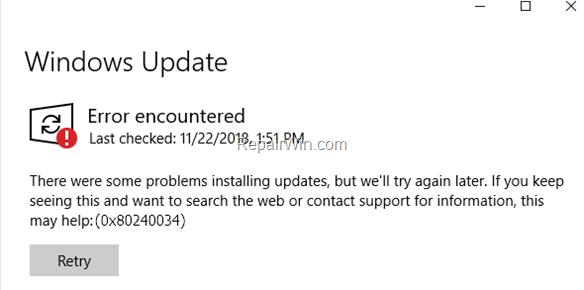
On a Windows 10-based computer, you may receive the following error message when you try to check for new updates: “There were some problems installing updates, but we’ll try again later. If you keep seeing this and want to search the web or contact support for information, this may help: (0x80240034)”.
The Error 0x80240034 in Windows 10 Update, usually occurs if the developer mode is enabled on the computer, or because of a corrupted update file (WU_E_DOWNLOAD_FAILED).
To resolve the Windows 10 Update error “0x80240034”, follow the methods below.
How to FIX: 0x80240034 error in Windows 10 Update
Method 1. Turn OFF the Windows Developer Mode.
The first method to resolve the error 0x80240034 in Windows 10 update, is to check if the Developer Mode is enabled on your system, and to disable if it is.
1. Navigate to Settings > Update and Security.
2. Select For developers on the left pane, and at right pane select Sideload Apps. Then click Yes to confirm.
3. Now, navigate to Settings –> Apps -> Apps & Features > Manage optional features.
4. Choose the Windows Developer Mode and click Uninstall.
5. Restart your PC to apply the change, and then retry to install the update.
Method 2. Delete the ‘SoftwareDistribution’ Folder.
The “C:WindowsSoftwareDistribution“ folder, is the location where Windows store the Windows Updates. Many times, this folder becomes corrupted and you must re-create it in order to download the updates from scratch. To rebuild (re-create) the “SoftwareDistribution” folder follow the steps below:
Step 1: Stop Windows Update Service.
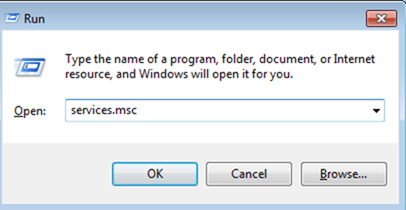
1. Open Windows Services control panel: To do that:
- Press Windows
 + R keys to open the run command box.
 - In the Search box, type: services.msc & click OK.
- (Accept the UAC warning if appears).
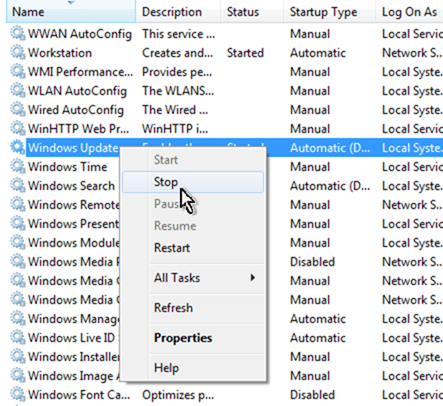
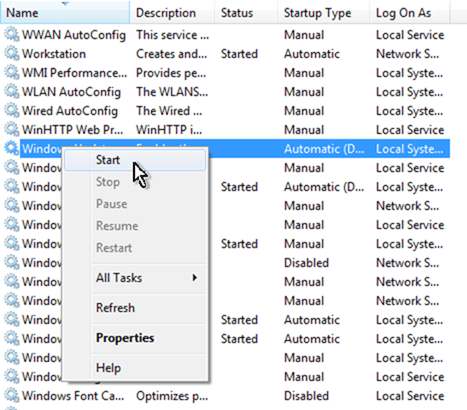
2. In Services control panel locate the “Windows Update” service.
3. Right-click on Windows Update service and select “Stop”.
Step 2: Delete the SoftwareDistribution folder.
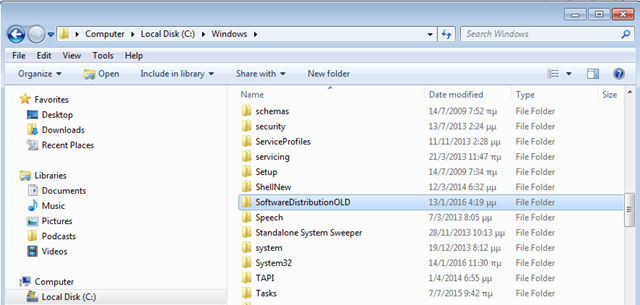
1. Open Windows Explorer and navigate to: C:Windows folder.
2. Find and Delete the “SoftwareDistribution” folder (or rename it. e.g. to “SoftwareDistributionOLD”) .
Step 3: Start the Windows Update Service.
1. Open Windows Services control panel.
2. Right-click on Windows Update service and select “Start”.
Step 4: Check and Install Windows 10 Update.
1. Navigate to Settings -> Update and Security and click Check for Updates.
Method 3. Update Windows 10 by using the Update Assistant
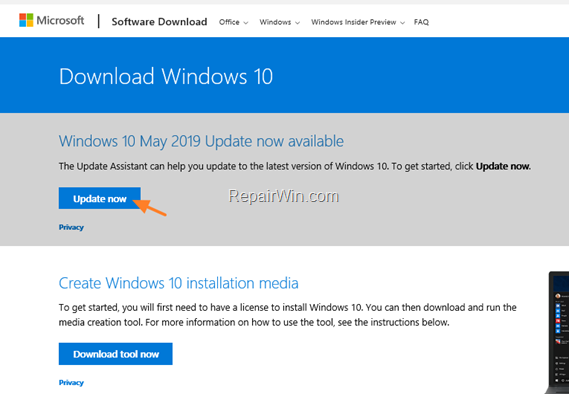
1. Navigate to Windows 10 download site and click the Update now button.
2. Save the “Windows10Upgrade9252.exe” file on your desktop.
3. Double click at the downloaded file to open the Windows Upgrade Assistant.
4. Click Update Now to start the update.
5. Let Windows to finish the downloading and the verification.
6. When the verification is reaches 100%, disconnect your computer from the Internet, or set it to “Airplane mode“.
7. Wait until Windows updating your system.
8. When prompted, restart your system to install the update.
Method 4. Update Windows 10 from ISO/USB.
The next method the Windows 10 update error “0x80240034” is to update Windows 10, from the Windows ISO file. To do that:
Step 1. Download Windows 10 in a ISO File.
1. Navigate to Windows 10 download page and download the Media Creation Tool.
2. Run the ‘Media Creation Tool’ and Accept the License Terms at the first screen.
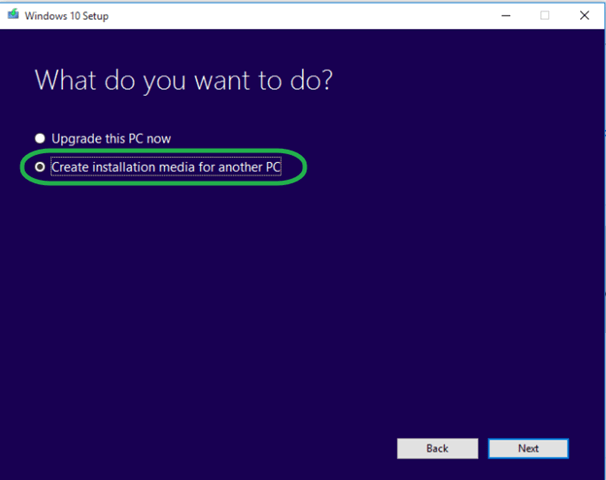
3. Select Create installation media for another PC.
4. At ‘Language, architecture and edition’ screen click Next.
5. Select ISO file and click Next.
6. Save the ‘Windows.iso’ file to your desktop.
7. The Media Creation Tool will now begin to download the Windows 10 in an ISO format.
8. When the download is completed, close the Media Creation Tool.
Step 2. Update Windows 10 from the ISO file.
1. Disconnect your computer from the Internet, (or set it to “Airplane mode” if you own a laptop).
2. Disable or temporarily uninstall any third-party antivirus.
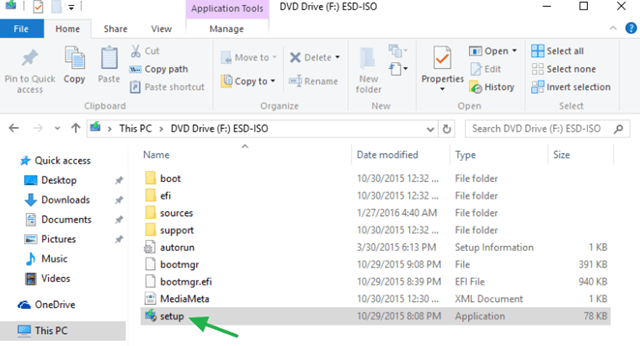
3. Then, right click on the “Windows.iso” file (on your desktop) and click Mount.
4. Double click at Setup application.
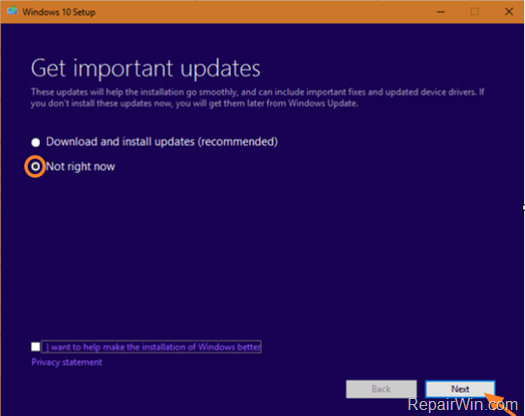
5. At the below screen choose ‘Not right now’ and click Next.
6. Follow the rest onscreen instructions to update your system.
Method 5. Clean install Windows 10.
The last method, to fix the Windows 10 Upgrade issues, is to perform a clean installation of Windows 10 on your system.
Important: The clean Windows 10 installation means that all your files and settings will be lost during the installation process. So, proceed and backup all your important files and settings to another storage media before continue. (e.g. to an external USB drive).
To perform a clean Windows 10 installation read the instructions on this article: How to clean install Windows 10
That’s all folks! Did it work for you? Please leave a comment in the comment section below or even better: like and share this blog post in the social networks to help spread the word about this solution.


![image_thumb[4] image_thumb[4]](https://techprotips.com/wp-content/uploads/2020/07/echo/image_thumb4_thumb-3.png)
![image_thumb[5] image_thumb[5]](https://techprotips.com/wp-content/uploads/2020/07/echo/image_thumb5_thumb.png5f181d6875b88.jpg)
