,
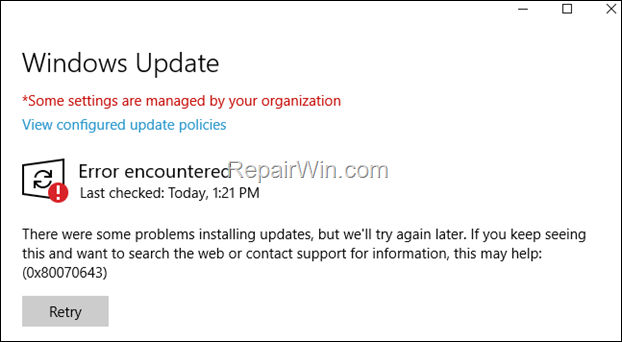
Many users reported that the Windows Recovery Environment update KB5034441 for Windows 10, fails to install with error code: 0x80070643. The issue is known to Microsoft and the suggested way to fix the problem is to increase the size of the recovery partition.
According to Microsoft, update KB5034441 addresses a security vulnerability in the recovery environment that could allow attackers to bypass BitLocker encryption using WinRE. This update requires 250 MB of free space in the Recovery partition to install successfully. However, if the Recovery partition does not have enough free space, update KB5034441 will not install with an error message:
- 0x80070643 – ERROR_INSTALL_FAILURE
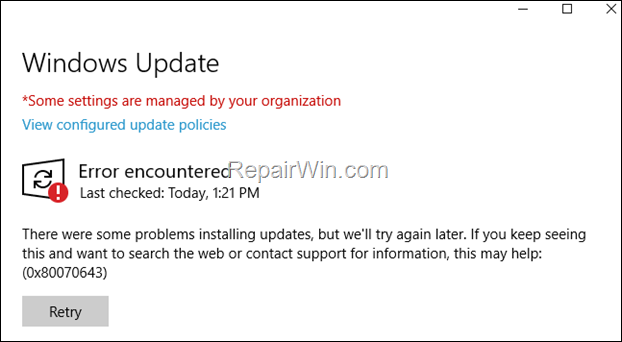
If you cannot install the “2024-01 Security Update for Windows 10 Version 22H2 for x64-based Systems (KB5034441)” due to error 0x80070643, continue reading below to fix the problem.
How to Fix Error Code 0x80070643 on Windows 10 22H2 KB5034441 Update.
Method 1. Increase Recovery Partition Size with MiniTool Partition Wizard Free.
As Microsoft says installing the KB5034441 update requires 250 megabytes of free space on the recovery partition. So, to avoid error “0x80070643 – ERROR_INSTALL_FAILURE” on KB KB5034441 update, you have to manually resize the recovery partition as instructed in this Microsoft article: KB5028997: Instructions to manually resize your partition to install the WinRE update.
But, if you’re looking for an easiest method to increase the size of the recovery partition, then you can use a free partition management tool, like MiniTool Partition Wizard Free or AOMEI Partition Assistant Free to resize the recovery partition using the instructions below:*
* Note: For the purpose of this tutorial we show you how to increase the size of a partition using MiniTool Partition Wizard Free.
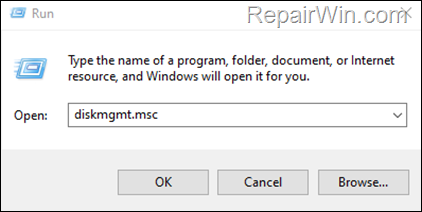
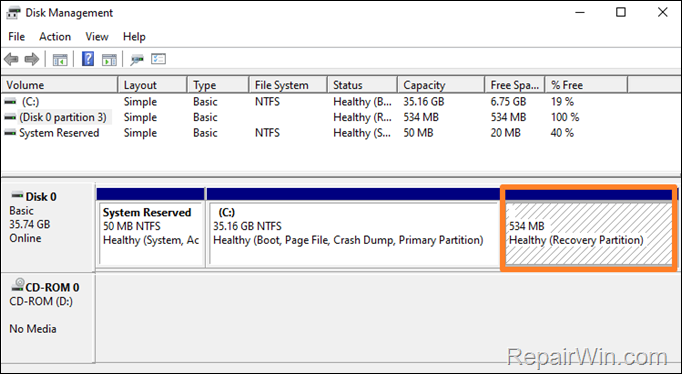
Step 1. Notice the Size of the Recovery Partition in Disk Management.
3. In Disk Management locate the “Recovery Partition” and notice its size in MB (e.g. “534 MB” in this example).
4. Then according the result, proceed as follows:
- If the size of Recovery Partition is below 250 MB then continue to step-2 below.
- If the size of the Recovery Partition is over 250MB, then skip to Method-2.
- If the Recovery Partition is missing then you can safely ignore the error 0x80070643, because you don’t need the KB5034441 update. In such case you can proceed and hide the update KB5034441 by using the instructions on Method-4 below.
4. Close Disk Management and continue to next step.
Step 2. Backup your data to an external USB drive.
Important: As a precaution, back up your data to an external storage device (eg. to a USB disk), before resizing partitions.
Step 3. Install MiniTool Partition Wizard Free.
1. Download MiniTool Partition Wizard Free.
2. When the download is completed open the downloaded file and install the Free edition of the program.
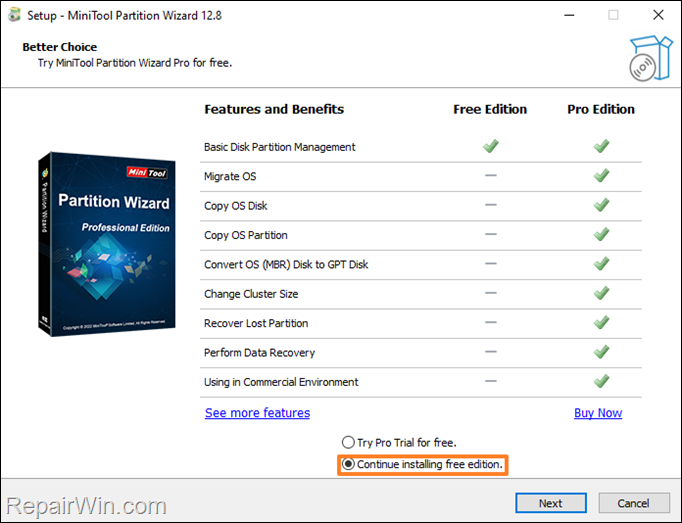
3. When the installation is complete, continue to next step.
Step 4. Resize Recovery Partition using MiniTool Partition Wizard.
1. Open MiniTool Partition Wizard.
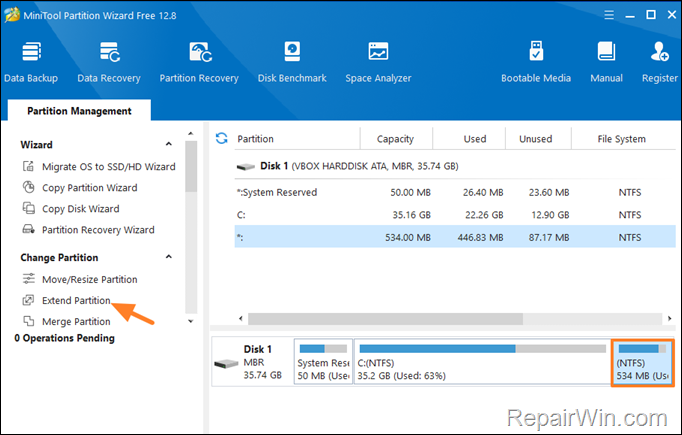
2. Locate and select the Recovery Partition according its size in MB size you noticed in step-1 above (e.g. “534 MB” in this example), and then click Extend Partition on the left pane.
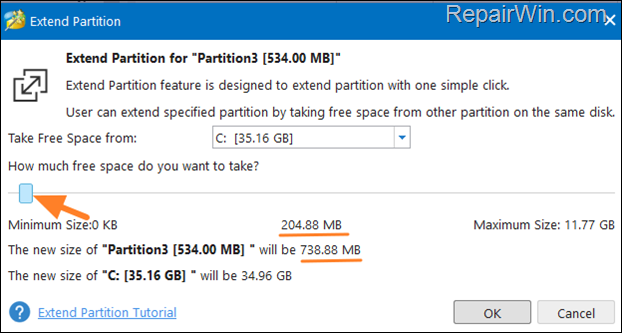
3. Now using the slider take at least 200 MB of space from the C: drive to increase the size of the Recovery Partition by 200 MB. When done, click OK.
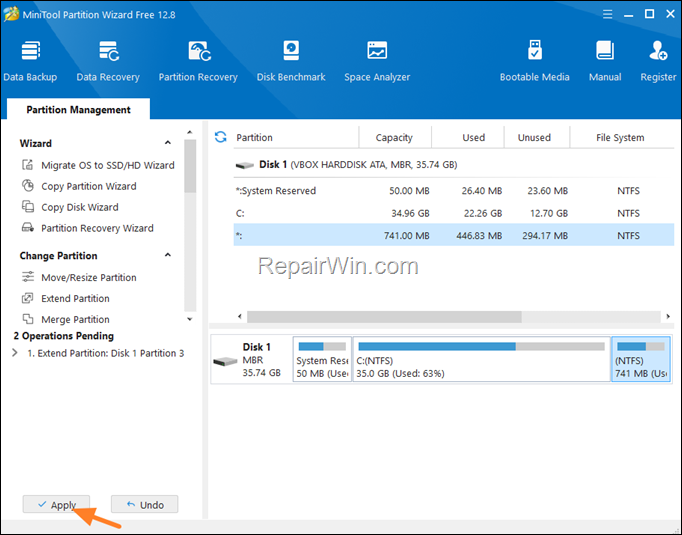
4. Now click the Apply button to apply the change.
5. Then close all open applications (if any) and click Yes to proceed.

6. Finally, click Restart Now to restart the computer so that MiniTool Partition can complete the pending tasks.
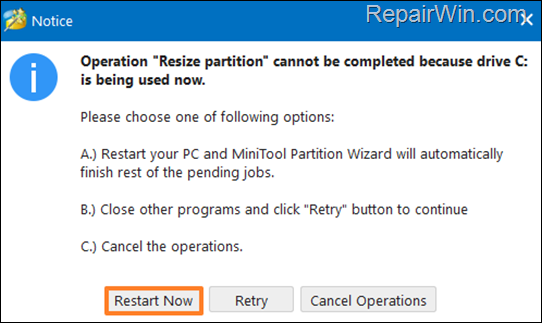
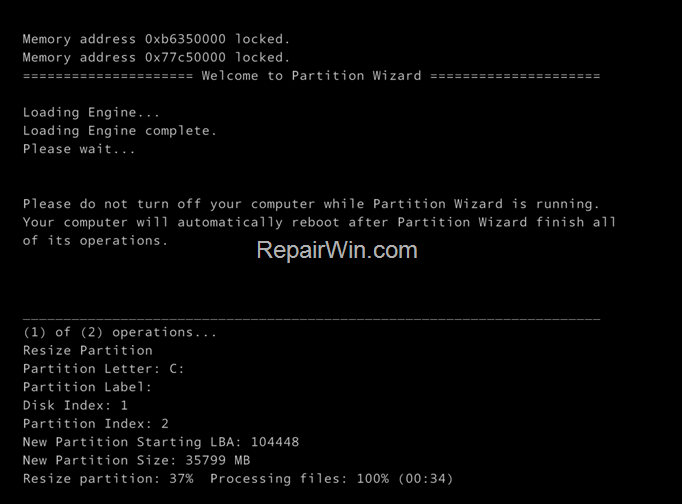
7. After restarting the computer, MiniTool Partition Wizard will resize the partition. Wait for the task to complete and do not turn off your computer. When the operation is complete, your computer will automatically restart and enter Windows.
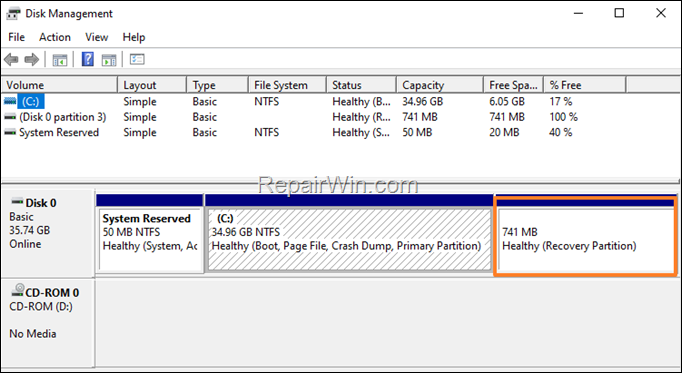
8. After entering Windows, open Disk Management again and verify that the size of the Recovery Partition has increased.
9. Finally, open Windows Update and try to install again the KB5034441 update on Windows 10.*
* Note: Several users have reported that the error 0x80070643 in Windows 10 KB5034441 update continues to appear even after increasing the size of the Recovery partition. So if you are facing the same problem, try if you want methods 2 and 3 below to see if you can fix the problem or better go directly to Method-4 to hide the update until Microsoft fixes the problem.
Method 2. Repair Windows System Files with DISM & SFC Tools.
The next method to solve the installation error 0x80070643 in KB5034441 update, is to check and repair the Windows 10 system files using the DISM and SFC tools. To do this:
1. Open Command Prompt as Administrator.
2. In command prompt give the following command and press Enter:
- DISM /Online /Cleanup-Image /StartComponentCleanup

3. When the process is completed, give the following command:
- DISM.exe /Online /Cleanup-image /Restorehealth

4. When the DISM operation is completed, type the following command and hit Enter:
sfc /scannow

5. Now wait until the System File Checker (SFC), repairs the Windows System Files.
6. When this done, restart your computer.
7. Open Windows Update and try to install the failed update(s).
Method 3. Force Windows 10 to Redownload KB5034441.
Sometimes updates cannot be installed because they have not been downloaded correctly. In such a case forcing windows to redownload and retry to install the updates resolves the issue. To do this:
Step 1: Stop the ‘Windows Update’ service.
![]() + R keys to open the run command box.
+ R keys to open the run command box.
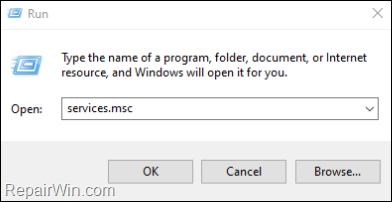
2. In the Search box, type: services.msc & click OK to open the Services panel.
3. In Services control panel locate the Windows Update service.
3a. Then, right-click on Windows Update service and select Stop.
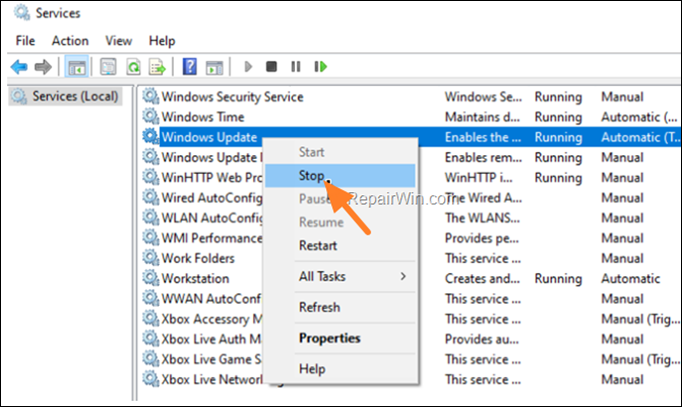
4. Now, without closing the Services window proceed to Step-2 below.
Step 2: Delete the ‘SoftwareDistribution’ folder. *
* Info: The “C:WindowsSoftwareDistribution“ folder, is the location where Windows store the Windows Updates. Many times, this folder becomes corrupted and you must re-create it in order to download the updates from scratch.
1. Open Windows Explorer and navigate to: C:Windows folder.
2. Find delete or rename the SoftwareDistribution folder (e.g. to “SoftwareDistributionOLD”) .
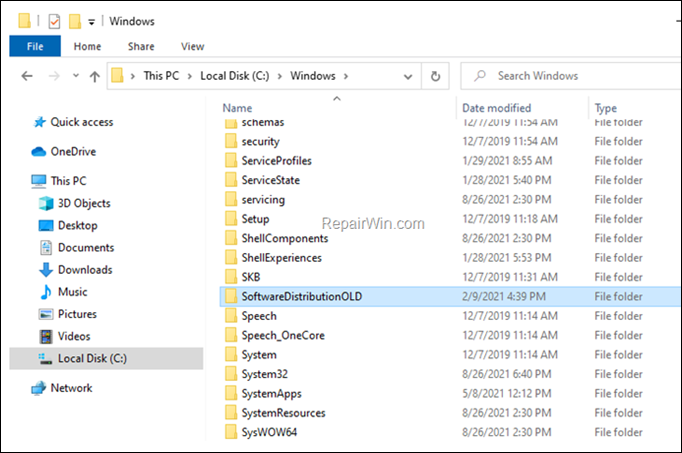
Step 3. Start the ‘Windows Update’ service.
Now open the Services control panel and start the Windows Update service.
1. Right-click on Windows Update service and select Start.
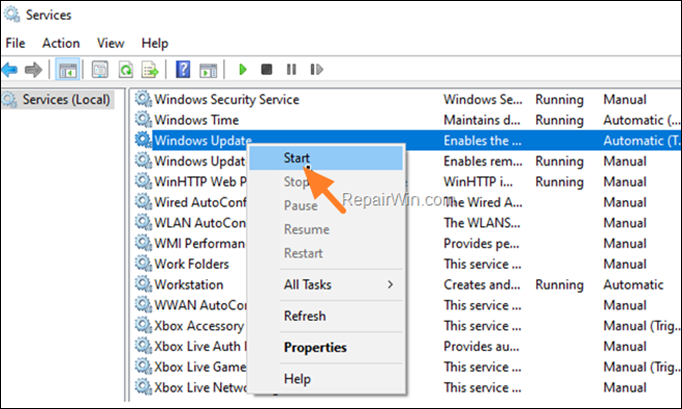
Step 4: Check and Install Windows 10 Updates.
1. Finally, navigate to Start > Settings > Windows Update and click Check for Updates.
2. Then, let Windows to download and install the update(s).
Method 4. Hide the KB5034441 Update.
If none of the above methods fixed the issue, then you can “tell” Windows 10 to skip and don’t install the KB5034441 Update, until Microsoft fixes the issue. To do this:
1. Download the Show or Hide Updates troubleshooter tool from one of the following location:
2. Run the Show or hide updates tool “wushowhide.diagcab” and click Next at first screen.

3. At the next screen choose Hide Updates.

4. Then check the 2024-01 Security Update for Windows 10 Version 22H2 for x64-based Systems (KB5034441) and click Next.

5. Wait until the troubleshooter applies the appropriate changes on your system and then click Close.
6. Navigate to Windows Update options and click Check for Updates.
That’s all folks! Did it work for you? If so, by what method?
Please leave a comment in the comment section below or even better: like and share this blog post in the social networks to help spread the word about this problem.
