,
If you want to stop Windows 10 from upgrading to Windows 11, then this article is for you.
As Microsoft has announced, Windows 10 support will end on October 14, 2025, and the current version, 22H2, will be the last version of Windows 10. For this reason Microsoft is pushing users to upgrade to Windows 11 on all devices that meet the requirements of Windows 11.
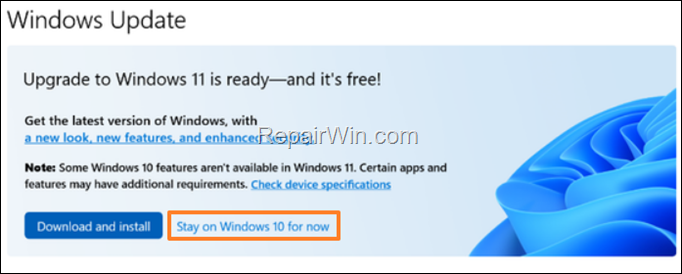
In such a case, navigate to Windows Update panel (from Start > Settings > Update & Security) and at the “Upgrade to Windows 11” message, click Download and install to upgrade Windows 10 to Windows 11 immediately or, if you are not ready to upgrade your system to Windows 11, simply click on Stay on Windows 10 for now,* to temporally postpone the upgrade.
* Note: If you choose to “Stay with Windows 10 for now”, then after a while you will be prompted again to download and install Windows 11. To avoid this, and stay with Windows 10 without any prompting to upgrade to Windows 11, follow the instructions below..

How to Prevent Windows 11 Upgrade on Windows 10.
If you are one of those users who want to stay on Windows 10 “forever” and completely block the automatic upgrade to Windows 11, follow the steps in one of the methods below.*
* Note: If your computer is already upgraded to Windows 11, then to “cancel” the upgrade, go to Settings > System > Recovery and under Recovery options, click Go back to return to Windows 10. After returning to Windows 10, follow the instructions in this article to prevent your system to upgrade to Windows 11 again.
Method 1. Block Windows 11 Upgrade forever via Registry.
The first method to prevent Windows 11 from automatically upgrading is to specify the version of Windows 10 you want to stay on through Windows Registry. (e.g. the “Windows 10 v22H2”. To do that:*
* Note: This method applies in all Windows 10 versions (Home, Pro, Education & Enterprise).
![]() + R keys to open the run command box.
+ R keys to open the run command box.
2. Type regedit and press Enter.
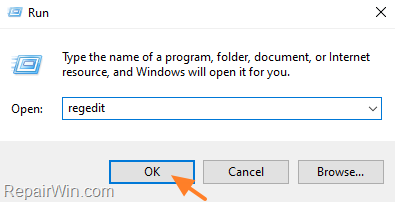
2. In Registry Editor, navigate to the following location:
- HKEY_LOCAL_MACHINESOFTWAREPoliciesMicrosoftWindowsWindowsUpdate
3a. At the right pane, right-click on an empty space and select New > DWORD (32-bit) Value.
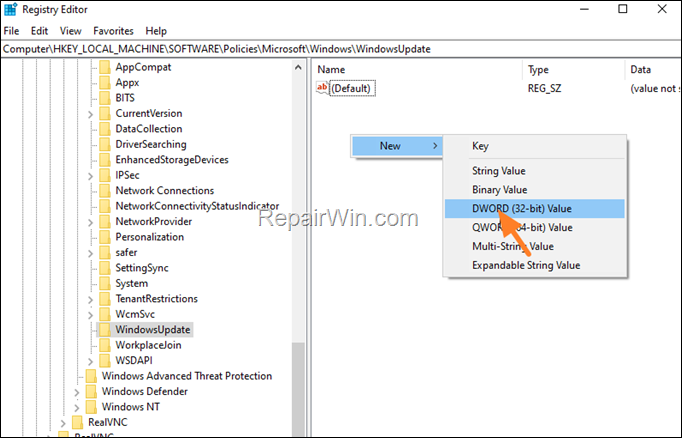
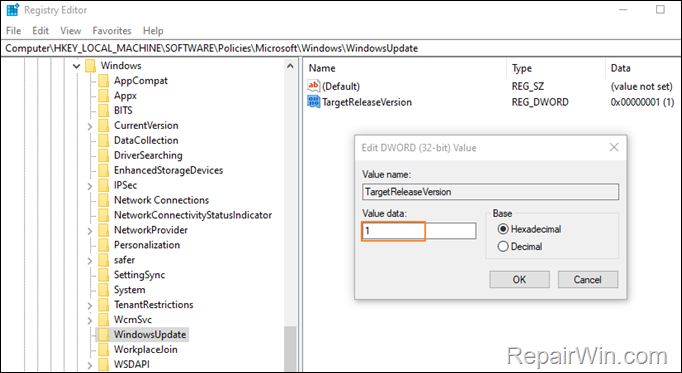
3b. Name the new value as: TargetReleaseVersion and hit Enter.
3c. Now, open the new value, set the Value data to 1 and then click OK.
4a. Right-click on an empty space and select New > String Value.
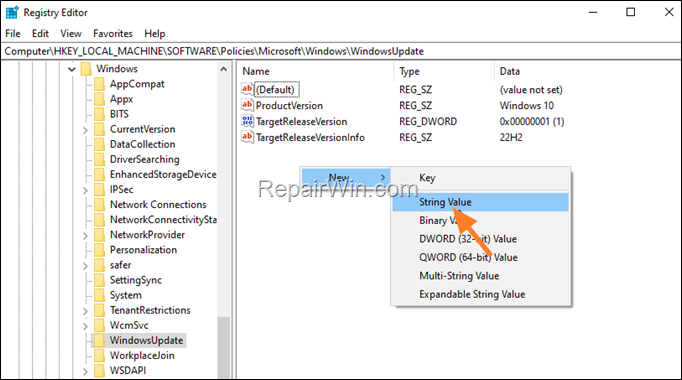
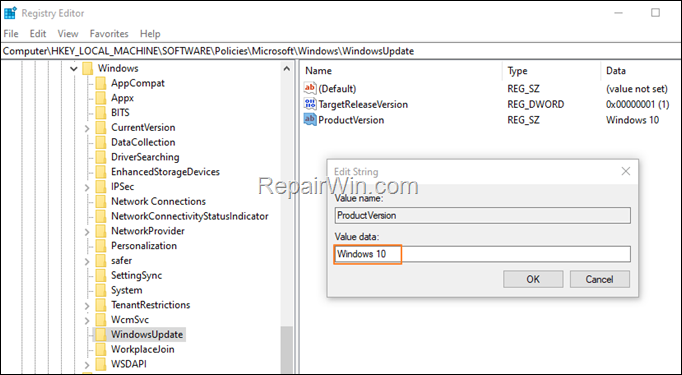
4b. Name the new string as: ProductVersion and hit Enter.
4c. Open the new string, type in Value data to Windows 10 and then click OK.
5a. Right-click again on an empty space and select New > String Value.
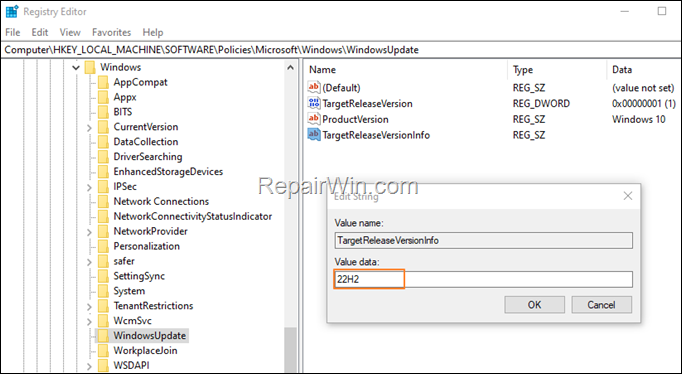
5b. Name the new string as: TargetReleaseVersionInfo and hit Enter.
5c. Open the new string, set the Value data to 22H2 and then click OK.
6. Close the Registry Editor and restart your computer to apply these changes and you’re done!
How Block Windows 11 Update via Group Policy.
If you’re running Windows 10 Pro, Education or Enterprise, you can prevent the auto upgrade to Windows 11 in Group Policy with the instructions below:
![]() + R keys to open the run command box.
+ R keys to open the run command box.
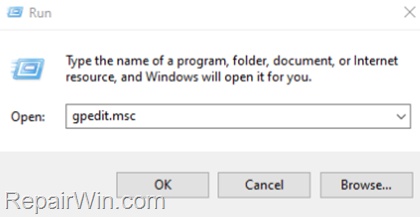
2. In the Search box, type: gpedit.msc & click OK to open the Group Policy Editor.
3. In Group Policy Editor navigate to the following location:
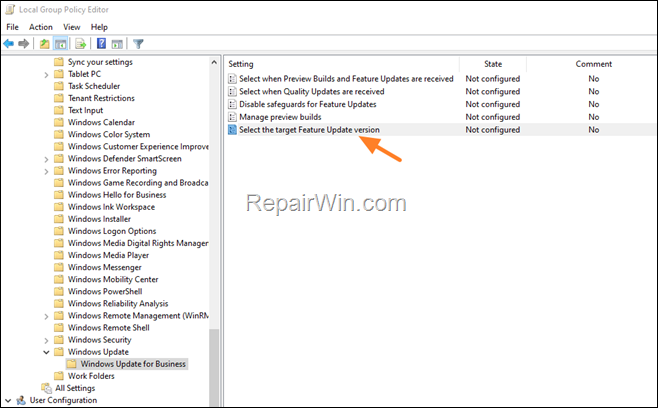
- Computer ConfigurationAdministrative TemplatesWindows ComponentsWindows UpdateWindows Update for Business
4. At the right pane, open the Select the target Feature Update version policy.
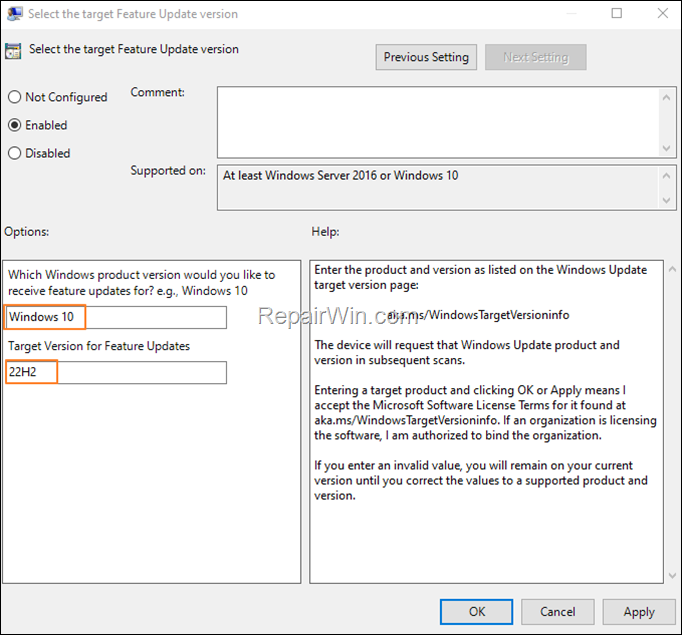
5. Set the policy to Enabled and below…
- At Which Windows product version would you like receive features updates for, type: Windows 10
- At Target Version for features Updates, type: 22H2
6. When done, click Apply > OK and close the Policy Editor.
7. Restart your computer and you’re done!
That’s all folks! Did it work for you? If so, by what method?
Please leave a comment in the comment section below or even better: like and share this blog post in the social networks to help spread the word about this problem.
