Last updated on September 2nd, 2020
In a previous article I mentioned the required step to create a Virtual Machine in vSphere Hypervisor ESXi 6.7. In this article, you ‘ll learn how to clone a virtual machine, on vSphere Hypervisor ESXi 6.7.
The Virtual Machine cloning, is usually an easy two-step process when you have a vCenter server. But what if for any reason you do not have a vCenter server, and you need to clone a virtual machine from the ESXi host? The next steps are going to explain how to achieve this.
How to Clone Virtual Machines in vSphere ESXi 6.7.
In order to clone a Virtual machine from ESXi, you have to find out first, where are stored the Virtual machine’s files and it’s virtual disk. To do that:
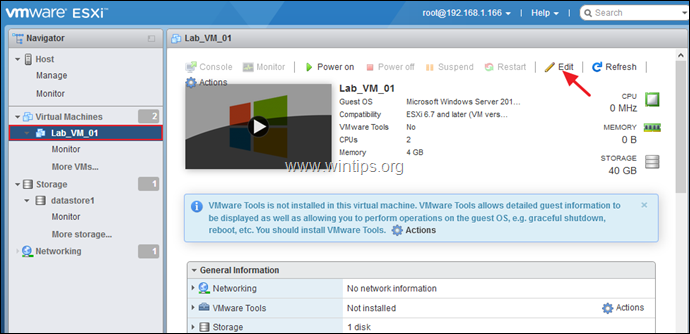
1. Power Off (Shut down) the machine that you want to clone.
2. Then, select the Virtual machine that you want to clone and click Edit. (or right-click on the machine and select Edit Settings)

3. At Virtual Hardware tab, expand the Hard Disk 1 and notice the name and the location (datastore) of the Disk File (vm_name.vmdk).

4. At next, select the VM Options tab, expand the General Options and notice the name and the location of the VM Config file (vm_name.vmx). When done, click Cancel to close this window.

5. Now select Storage and open the Datastore browser.
![image_thumb[13]](https://techprotips.com/wp-content/uploads/2020/09/echo/image_thumb13.png "image_thumb[13]")
6. At the left pane select the Datastore that you want to store the VM files for the cloned machine and click Create directory.

7. Type a name for the new folder and click Create Directory. *
* Note: At the new folder, will be stored the files of the new cloned machine, so give a recognizable name.

8. Now, select the storage folder of the VM that you want to clone.
9a. Right click at the “vm_name.vmdk” file and select Copy.

9b. Select the new folder you created before for the new cloned machine and click Copy.

9c. Perform the same steps, and copy the “vm_name.vmx” to the new folder.

9d. When done, click Close.
10. Now, click Monitor and then the Tasks tab. Once the copy process is completed, proceed to the next step.

11. When the copy is finish, re-open the datastore browser. (Storage > Datastore browser).
12. Navigate to the new VM’s storage folder, right click on the “vm_name.vmx” config file, and select Register VM. Then click Close.

13. The cloned Virtual Machine should now appear (at the end), on the ESXi host inventory screen.

14. Right click on the cloned machine and select Rename.

15. Type a new name for the clone machine and click Rename.

16. That’s it! The cloned machine is ready for use. Power on the machine to boot the clone…
That’s it! Let me know if this guide has helped you by leaving your comment about your experience. Please like and share this guide to help others.

do earn a commision from sales generated from this link, but at no additional cost to you. We have experience with this software and we recommend it because it is helpful and useful):
Full household PC Protection – Protect up to 3 PCs with NEW Malwarebytes Anti-Malware Premium!