,
In VirtualBox, you can choose between 2 types of disks when creating a new virtual machine: Fixed or Dynamic. Each type has its advantages and disadvantages, depending on your needs.
A dynamic disk is a virtual hard disk that starts with a small size that grows as you add data to it inside the Virtual Machine. Dynamic disks are space efficient because they use only the host storage space that is required but slightly impact computer performance as the disk expands.
A fixed disk, is a virtual disk that has a fixed size that is set when the virtual machine is created, and consumes all the space regardless of how much data is stored inside the Virtual Machine. Fixed disks are usually used for better performance, but on the other hand, when they “fill up” the available disk space they cannot grow any further.
In this guide you’ll learn how to convert a VirtualBox Fixed Disk to Dynamic in order to expand the available storage space on a VM machine and how to convert a VirtualBox Dynamic Disk to a Fixed Disk to free up disk space and optimize the performance.
How to Convert a Fixed Disk to Dynamic or a Dynamic Disk to Fixed in VirtualBox.
Step 1. Ensure that you have enough free disk space (IMPORTANT).
To convert a VirtualBox virtual disk to a different type (Fixed or Dynamic), you must create a new virtual disk file of the new type.
So, before proceeding further, make sure you have enough free disk space for the conversion/creation. (For example, if the size of the virtual disk (.VDI file) you want to convert is 50GB, then you must have at least 50GB available for the conversion).
After the conversion and if everything works correctly you can erase the original virtual disk (.VDI File) to free up disk space.
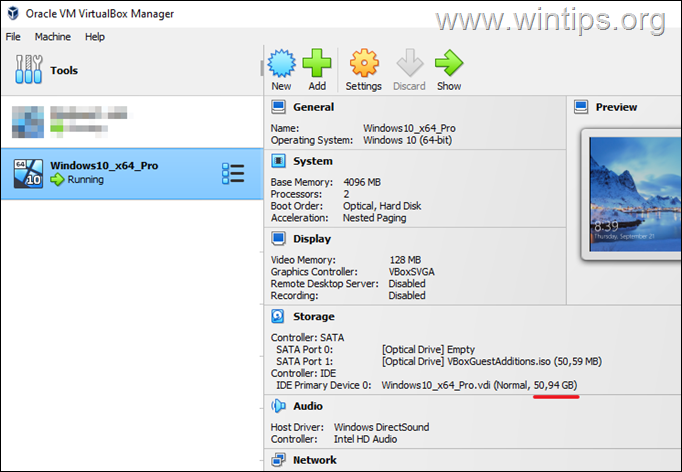
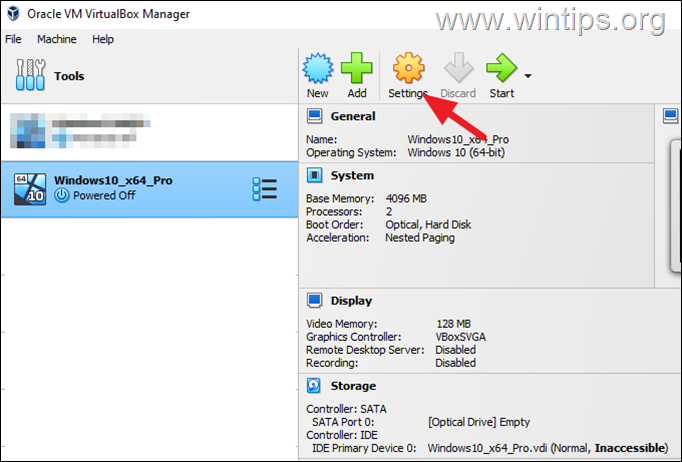
To find out the size of the virtual disk on a VirtualBox Machine, open the VirtualBox Manager, highlight the machine in the left pane and then look at Storage section on the right.
Step 2. Convert VirtualBox Virtual Disk to Different Type (Dynamic or Fixed).
1. Shutdown the Virtual Machine whose virtual disk you want to convert from Fixed to Dynamic (or vice-versa).
2. Open Command Prompt and give the following command, to navigate to the folder where VirtualBox is installed:*
- cd “C:Program FilesOracleVirtualBox”
* Note: This is the default install location of the VirtualBox application.
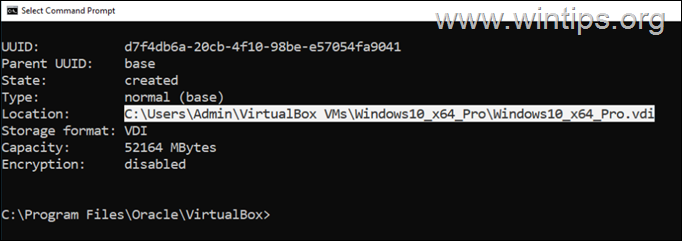
3. Then issue the following command to see a list of all virtual disks (VDI files):
- VBoxManage.exe list hdds

4. Now notice in the list the full file path of the virtual disk (.VDI file) that you want to convert from fixed to dynamic or vice-versa. Then mark it and press CTRL + C to copy the path* and paste it in notepad.
* e.g. “C:UsersAdminVirtualBox VMsWindows10_x64_ProWindows10_x64_Pro.vdi” in this example.
5. Now issue one of the below commands to create a new virtual disk (VDI) in the disk type you want (dynamic or fixed):
A. To Convert a Virtual Disk from Fixed to Dynamic, type:
- VBoxManage.exe clonemedium disk “source.vdi” “destination.vdi” –variant Standard
B. To Convert a Virtual Disk from Dynamic to Fixed, type:
- VBoxManage.exe clonemedium disk “source.vdi” “destination.vdi” –variant Fixed
* Notes: In the above command(s):
1. Replace “source.vdi” with the full file path of the VDI file (Virtual disk) that you want to convert to a different type of virtual disk.
2. Replace “destination.vdi” with the name and destination on the disk where the new VDI file (Virtual Disk) with the new type, will be stored during the conversion.
For example: To convert a FIXED virtual disk to DYNAMIC and the source VDI file (FIXED) is the “C:UsersAdminVirtualBox VMsWindows10_x64_ProWindows10_x64_Pro.vdi”, and you want to create the new VDI file (DYNAMIC) at the same location with name “Windows10_x64_Pro_Dynamic.vdi”, issue the following command:
- VBoxManage.exe clonemedium disk “C:UsersAdminVirtualBox VMsWindows10_x64_ProWindows10_x64_Pro.vdi” “C:UsersAdminVirtualBox VMsWindows10_x64_ProWindows10_x64_Pro_Dynamic.vdi” –variant Standard

6. Now wait until the conversion is complete, and when the new VDI file is created close the Command Prompt window and proceed to the next step.

Step 3. Rename VDI files.
1. Open Windows Explorer and navigate to the folder on disk where the “source” and “destination” VDI files are stored.*
* e.g. at “C:UsersAdminVirtualBox VMsWindows10_x64_Pro” in this example.
2. Rename the Source VDI file with a different name.*
* e.g. from “Windows10_x64_Pro.vdi” to “Windows10_x64_Pro.OLD.vdi” in this example.

3. Then rename the destination VDI file which you created before, with the original name of the source VDI file.*
* e.g. from “Windows10_x64_Pro_Dynamic.vdi” to “Windows10_x64_Pro.vdi” in this example

Step 4. Remove Inaccessible Virtual disks (.VDI files) in VirtualBox.
1. Open VirtualBox Manager.
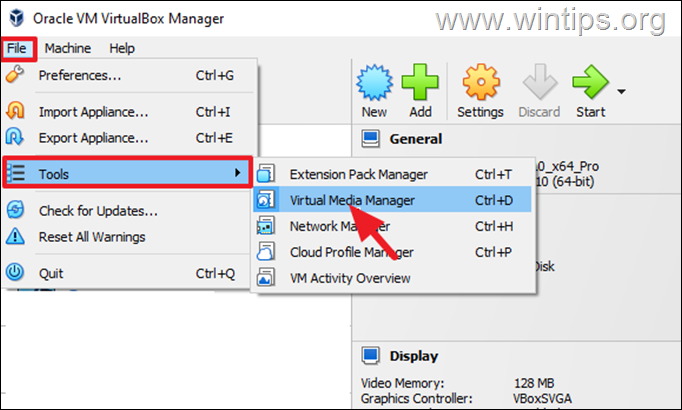
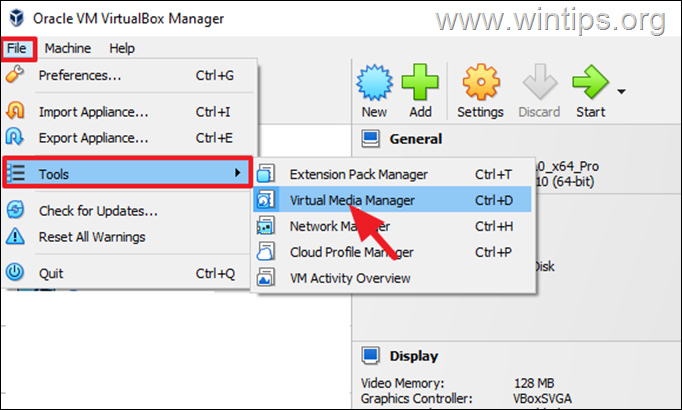
2. From the File menu, go to Tools > Virtual Media Manager.
3. Click once the Refresh button.
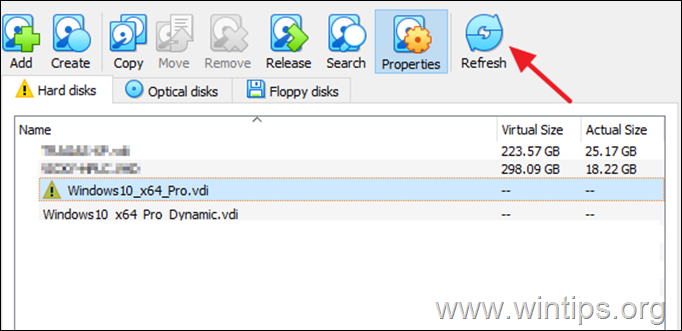
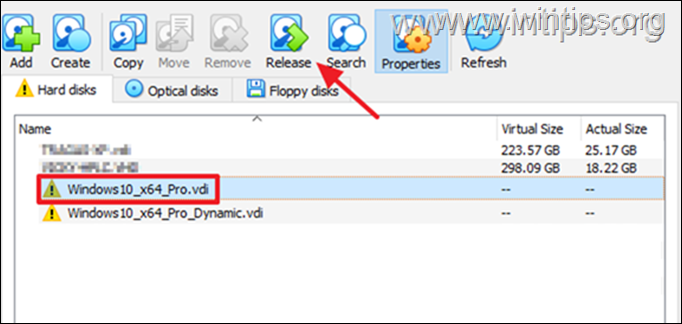
4a. Now, select the source virtual disk (VDI file) which marked with an exclamation mark, and click the Release button. (Click “Release” again when prompted).
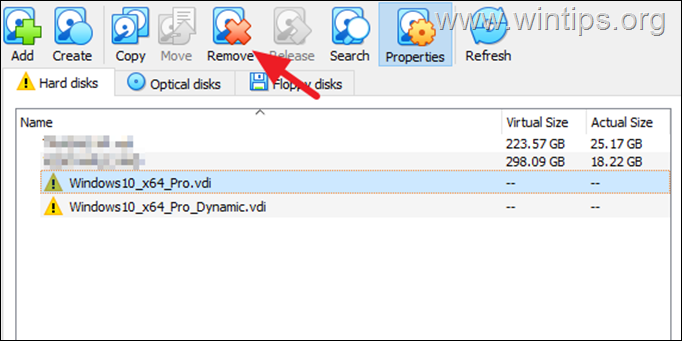
4b. Then click the Remove button to completely remove the old VDI file from this list. (Click “Remove” again when prompted).
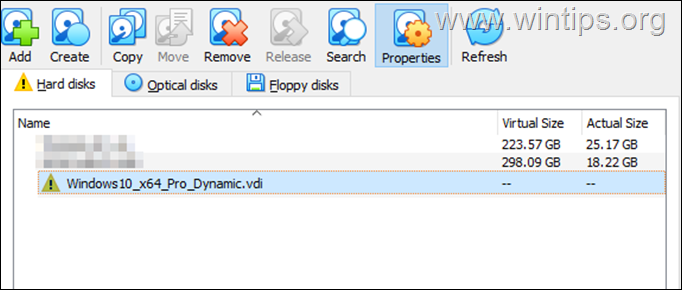
5. Perform the same step and Remove the second inaccessible VDI file. (Click “Remove” again when prompted).
Step 5. Attach the New (Converted) Virtual Disk (VDI) to Virtual Machine.
1. Select the virtual machine of which you converted the type of virtual disk in the first step, and click Settings.
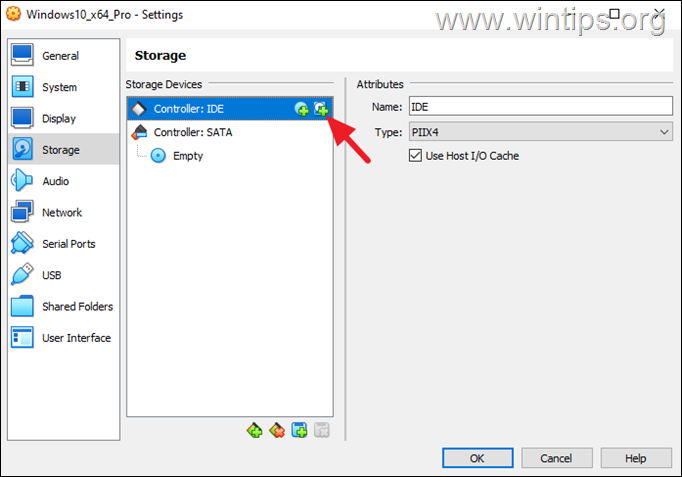
2. Select Storage on the left and then at right, click the 2nd plus (+) symbol next to “Controller:IDE” (or ‘SATA’), to Add Hard Disk. *
* Note: If you still see here, the inaccessible virtual disk (VDI file), select it and then remove it (before clicking the “Add Hard Disk” plus (+) symbol”.
3a. In Media Selector window, click the Add button.
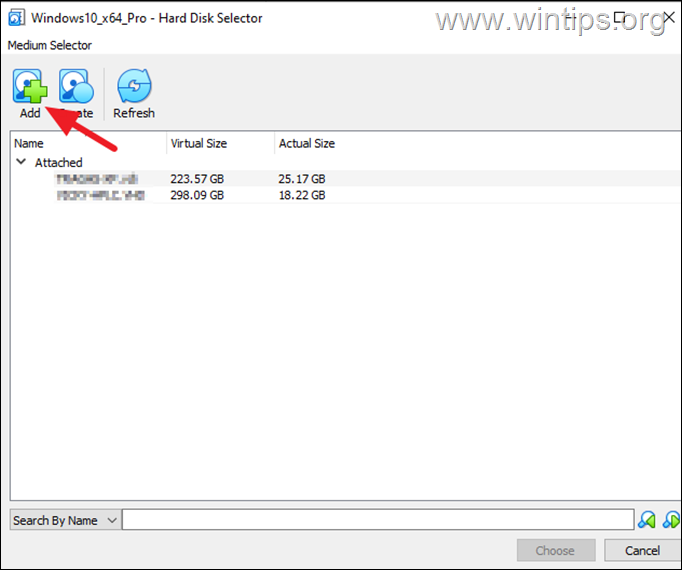
3b. Select the new virtual disk (VDI file) file and click Open.

3c. Then select it again (from the “Not Attached” list), and click Choose.

4. When done, click OK.
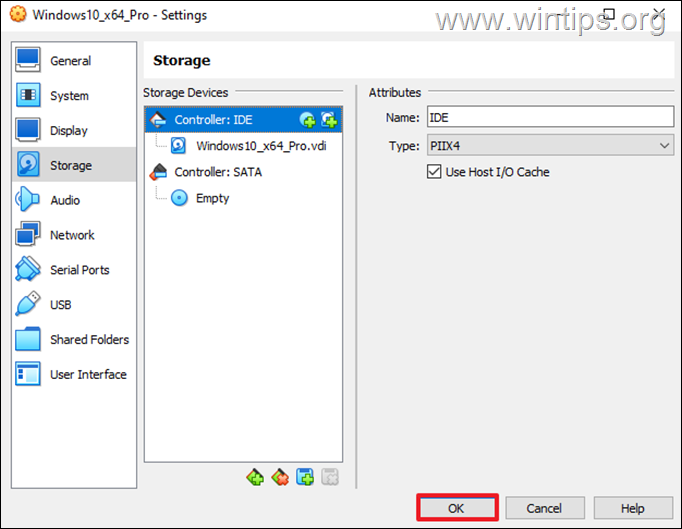
5. Start the Virtual Machine and you’re done! *
* Note: After making sure the virtual machine is running smoothly, go ahead and delete the old (source) VDI file to free up space.
That’s it! Let me know if this guide has helped you by leaving your comment about your experience. Please like and share this guide to help others.
