,
The Remote Desktop feature in Windows 11 Pro allows you to remotely access and control your Windows 11 computer from distance using any other device.
Using Remote Desktop, you can perform various tasks on the remote computer, such as running applications, accessing files, managing settings, and even troubleshooting as if you were in front of the remote computer. This feature is especially useful for professionals or for people who want to access their home or office computer while away (e.g. from their home).
With Remote Desktop, you can easily access your Windows computer from any device, including an Android phone or a MAC or Linux computer, either over a local area network (LAN) or the Internet.
To be able to access your Windows 11 computer remotely, you must turn-on the Remote Desktop feature and keep the computer turned on.
How to Enable Remote Desktop on Windows 11.
There are several different ways to activate Remote Desktop in Windows 10/11 and this guide has instructions for all of them.*
* Important: To be able to enable remote desktop, you must run Windows 11/10 Pro or Enterprise edition.
- Enable Remote Desktop in Settings.
- Turn On Remote Desktop in Control Panel.
- Activate Remote Desktop in Command Prompt.
- Enable Remote Desktop in PowerShell.
- Allow Remote Desktop Connections with Group Policy.
Method 1: Enable Remote Desktop on Windows 11 using Settings.
The first method to enable the remote desktop feature on Windows 10/11, is through the Windows Settings.
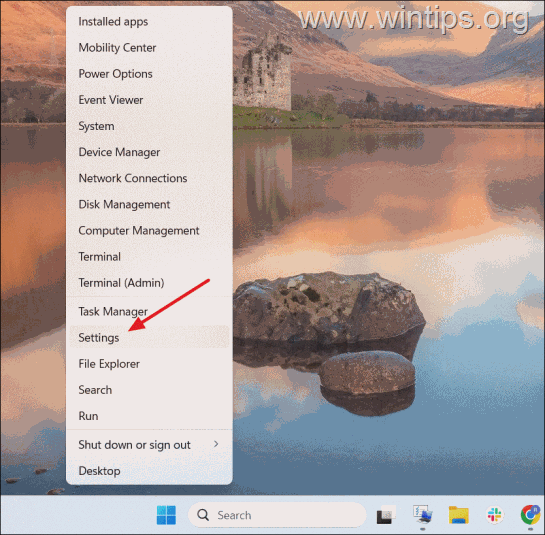
1. Right-click on Start menu and select Settings, or press Windows + I on your keyboard.
2. On the left sidebar, choose System and then click Remote Desktop from the right side.

3. Turn to On position the switch next to Remote Desktop to allow the remote desktop connections on your PC.*
* Note: If the Remote Desktop feature is greyed out, see the instructions on Method 2 & 3 below.

4. Then, click Confirm in the pop-up window to enable remote desktop.

5. After that, click on the Remote Desktop tile to expand and make sure that the Require devices to use Network Level Authentication to connect (Recommended) option is checked.

6. Then click the Remote Desktop Users tile to choose which users to allow remote access to this computer.

7. By default, all user accounts with administrative privileges on this PC can remotely access it. If you want to allow the remote desktop for other users, click the Add button.

8. Type the username of the user that you want to access this PC remotely and click Check Names to verify the username.

9. Then, click OK to add the user to the list.

10. Once you have added the remote desktop user(s), click OK.

11. After enabling the Remote Desktop, you will see a name listed next to the PC name option. Note this down, as you will need it when establishing a remote connection to this PC from another PC.*

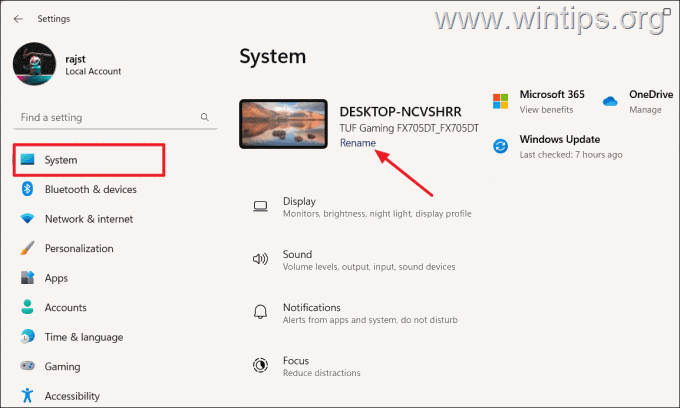
* Note: If the computer name is difficult to remember, you can either remotely connect to the computer using its IP address, or change its name by going back to System settings and clicking the Rename link.
Method 2: Allow Remote Connections in Control Panel.
If the Remote Desktop feature is greyed out in Windows Settings, you can enable it using the Control Panel instead. Let us see how:
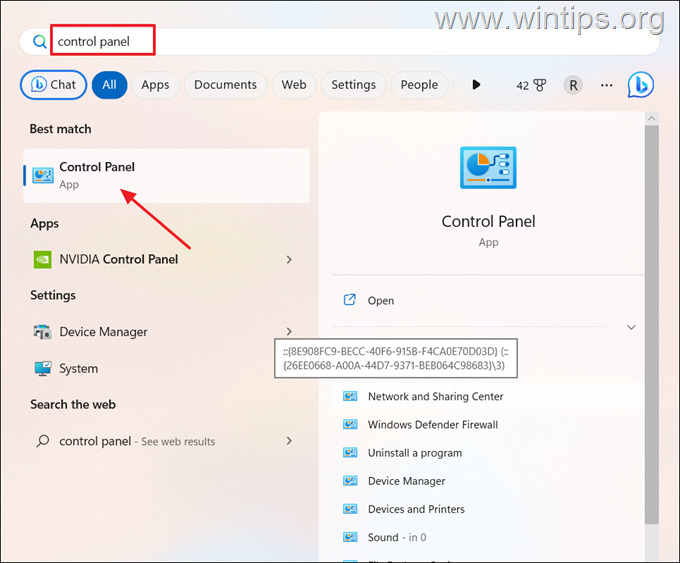
1. Open the Windows Search bar, type control panel and select the Control Panel app from the result.
2. In the Control Panel window, select System and Security.

3. Under the System section, click the Allow remote access link.

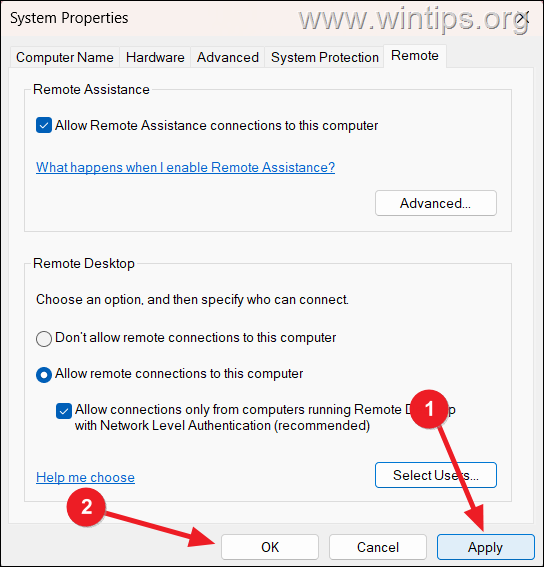
4a. On the System Properties window (at “Remote” tab”), check the Allow remote connections to this computer option under the Remote Desktop section.
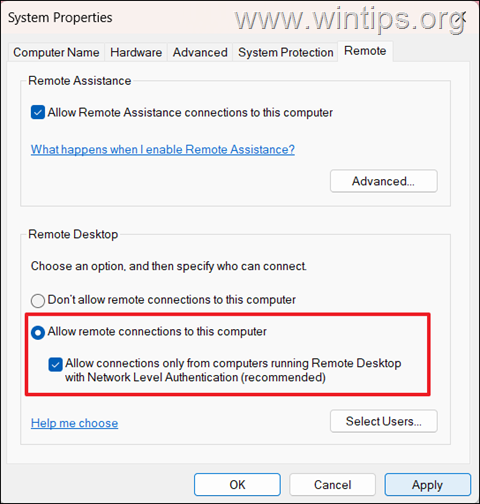
4b. By default, all administrator users can remotely access the PC through Remote Desktop. If you want to allow the remote desktop connection for other users, click the Select Users button to add them.

4c. When done, click Apply and OK to save the settings.

Method 3: Activate Remote Desktop from Command Prompt.
Another way to enable the Remote Desktop Connection on Windows 10/11 is by using the Command Prompt.
1. Open the search bar, type “command prompt” and then select the Command Prompt app and click Run as administrator. Then click Yes on the UAC prompt to proceed.
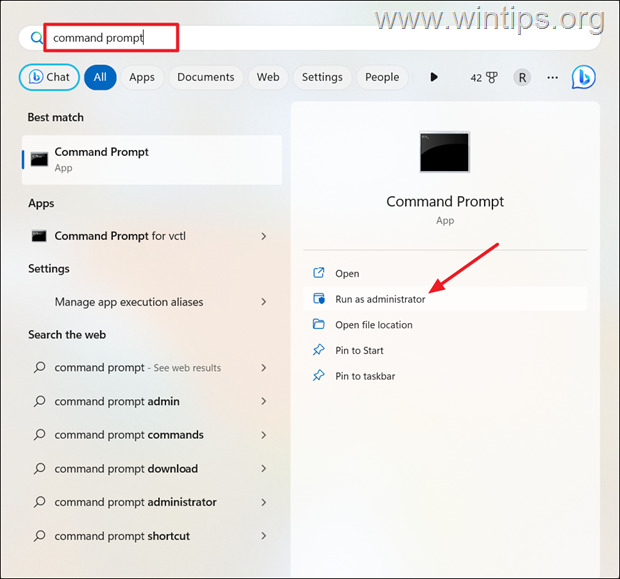
2. In command prompt, copy & paste the following command to enable remote desktop in registry:
- reg add “HKEY_LOCAL_MACHINESYSTEMCurrentControlSetControlTerminal Server” /v fDenyTSConnections /t REG_DWORD /d 0 /f

3. Then copy-paste the following command to allow remote desktop through the Windows Firewall:
- netsh advfirewall firewall set rule group=”remote desktop” new enable=Yes

4. After the command execution, close the Command Prompt window and restart the PC to apply the change.
Method 4: Enable Remote Desktop on Windows 11 from PowerShell.
To enable the Remote Desktop feature from Windows PowerShell on Windows 11, follow the below steps:
1. Type “powershell” in the search box, then select the Windows PowerShell app and click Run as Administrator.

2. Now type the following command and hit Enter to enable the remote desktop connection in Registry:
- Set-ItemProperty -Path ‘HKLM:SystemCurrentControlSetControlTerminal Server’ -name “fDenyTSConnections” -value 0

3. Then give this command to allow remote desktop connections in Windows Firewall,:
- Enable-NetFirewallRule -DisplayGroup “Remote Desktop”

4. Once the above commands are executed, Remote Desktop will be enabled and the firewall will be configured, allowing you to connect to the computer remotely.
Method 5: Enable Remote Desktop Connections in Group Policy Editor
Another way to allow the Remote Desktop Connections on a PC, is through the Local Group Policy Editor.
1. Press Windows + R keys to open the Run command box.
2. Type gpedit.msc, and hit Enter to open the Local Group Policy Editor.
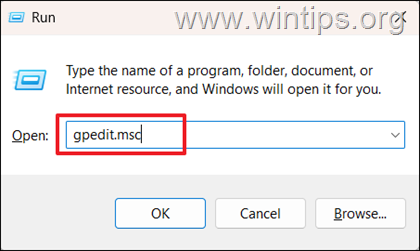
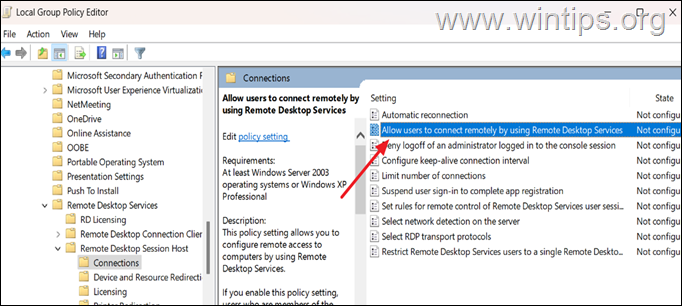
3. In Local Group Policy Editor console, navigate to the following location using the left panel:
- Computer Configuration > Administrative Templates > Windows Components > Remote Desktop Services > Remote Desktop Session Host > Connections
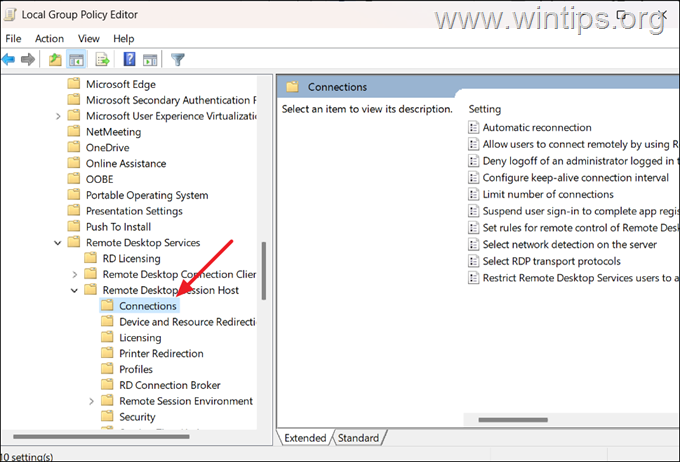
4. Now, double-click on Allow users to connect remotely by using Remote Desktop Services policy on the right-side pane.
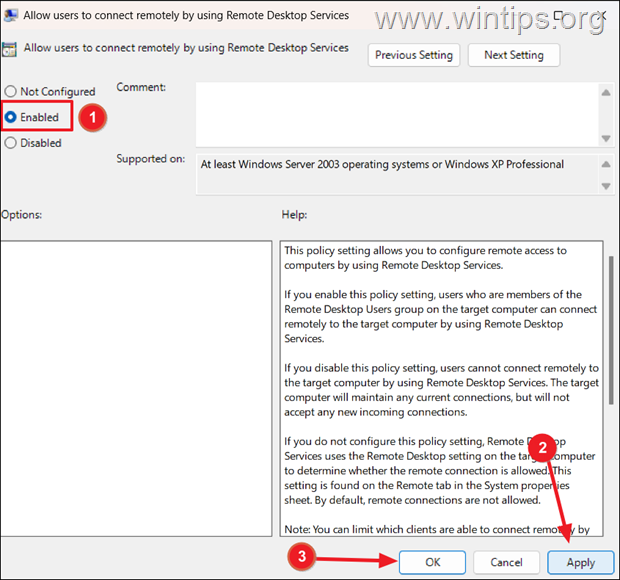
5. Select Enabled, click Apply and then click OK to enable Remote Desktop.
6. Close the Group Policy Editor and you’re done!
How to Connect to your Computer through Remote Desktop.
After you enable Remote Desktop Connection on your computer using one of the above methods, you should be able to connect to it remotely from another computer on the same network,* using applications such as Remote Desktop Connection (built-in) app or the Microsoft Remote Desktop (Microsoft Store) app.
* Note: To be able to connect through remote desktop to your computer from outside of your computer’s network, you will need to forward port “3389” from your router’s public IP address to your computer’s internal IP address, or to use a VPN.
To remotely connect to a PC using the Remote Desktop Connection (RDP):
1. Simultaneously press the Windows ![]()
![]() + R keys to open run command box.
+ R keys to open run command box.
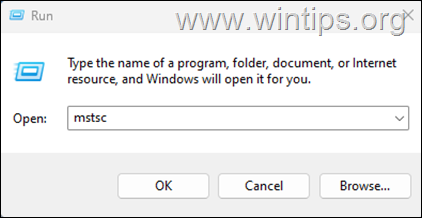
2. In run command box, type “mstsc” and press Enter to open the Remote Desktop Connection app.
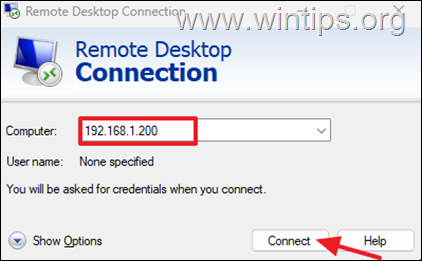
3. Type the name or the IP address of the remote PC and click Connect.
4. At Enter your Credentials window, type the Username & the Password of a user that is allowed to remote connect to the PC and click OK.

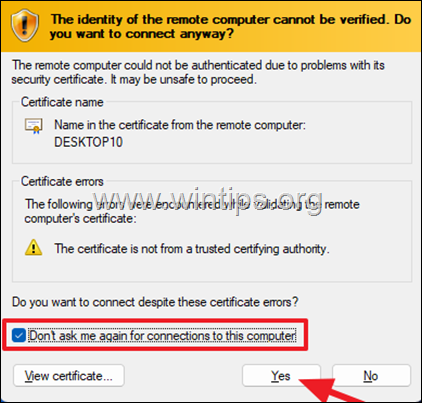
5. At the Certificate warning, select “Don’t ask about this certificate again” to avoid receiving the message in the future and click Yes.
Troubleshooting Remote Desktop Connection Problems.
If you have enabled Remote Desktop on your PC and you cannot connect to it remotely, proceed and allow the “Remote Desktop” feature in Windows Firewall in both PC’s as follows:
![]() + R keys to open the Run command box.
+ R keys to open the Run command box.
2. Type “firewall.cpl“ and hit Enter to open the Windows Firewall applet.

3. On the left side, click on Allow an app or feature through Windows Defender Firewall.

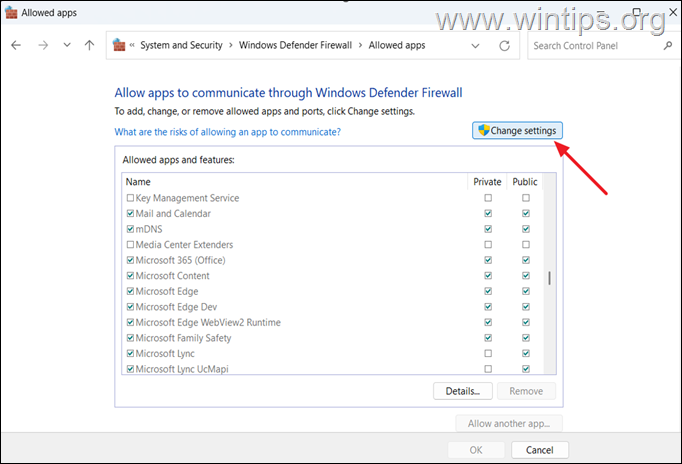
4. Then, click on Change settings.
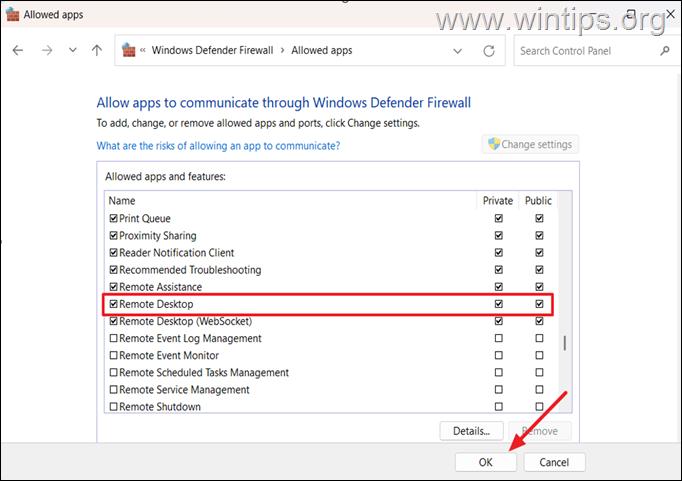
5a. Scroll down and find the Remote Desktop feature.
5b. Check both the Private and Public boxes next to Remote Desktop. Then, click OK to save the changes.
That’s it! Which method worked for you?
Let me know if this guide has helped you by leaving your comment about your experience. Please like and share this guide to help others.
