Last updated on November 9th, 2020
In this tutorial you will find step by instructions to setup a PPTP VPN Server 2016, in order to access your local network resources from anywhere in the world. So, if you have a Windows 2016 server with one network card and you want to setup a VPN connection
in order to connect and access server or network files from everywhere, continue reading below…*
* Note:
If you want to setup a more secure VPN Server for your network, then read this article:
How to Setup L2TP VPN Server 2016 with a Custom Preshared Key for Authentication.
How to Install a PPTP VPN Server 2016 (With only One NIC).
To install and configure the Server 2016 to act as a PPTP VPN access server follow the steps below:
Step 1. Install the Routing and Remote Access Role on Server 2016.
Step 2. Enable the Routing and Remote Access on Server 2016.
Step 3. Configure VPN Server Settings (Security, IP Range, etc.).
Step 4. Allow Routing and Remote Access Inbound Traffic in Windows Firewall.
Step 6. Configure the VPN Server to Allow the Network Access.
Step 7. Configure ISP’s Firewall to Allow the PPTP Connections.
Step 8. Setup the PPTP Connection on Clients
.
Step 1. How to Add Remote Access (VPN Access) Role on a Server 2016.
The first step to setup a Windows Server 2016, as a VPN server is to add the
Remote Access
role to your Server 2016. *
* Info:
For this example we’re going to setup VPN on a Windows Server 2016 machine, named “Srv1” and with IP Address “192.168.1.8”.
1.
To install VPN role on Windows Server 2016, open ‘Server Manager’ and click on
Add Roles and Features
.

2.
At the first screen of ‘Add Roles and Features wizard’, leave the
Role-based or feature-based installation
option and click
Next.

3.
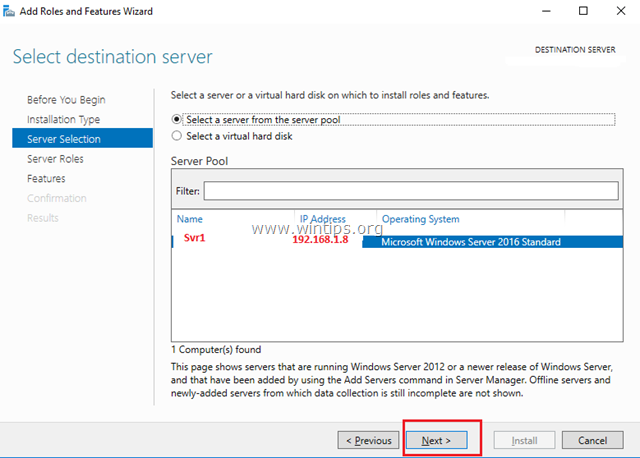
At the next screen, leave the default option ”
Select server from the server pool
” and click
Next.

4.
Then select the
Remote Access
role and click
Next
.

5.
At ‘Features’ screen leave the default settings and click
Next
.

6.
At ‘Remote Access’ information screen, click
Next
.

7.
At ‘Remote Services’, choose the
Direct Access and VPN (RAS)
role services and then click
Next
.

8.
Then click
Add Features.

9.
Click
Next
again.

10.
Leave the default settings and click
Next
(twice) at ‘Web Server Role (IIS)’ and ‘Role Services’ screens.

11.
At ‘Confirmation’ screen, select
Restart the destination server automatically (if required)
and click
Install.

12.
At the final screen, ensure that the installation of the Remote Access role is successful and
Close
the wizard.

13.
Then (from Server Manager)
Tools
menu, click on
Remote Access Management.
Select
14.
Direct Access and VPN
on the left and then click to
Run the Getting Started Wizard.

15.
Then click
Deploy VPN
only.

16.
Continue to
step-2
below to configure Routing and Remote Access.
Step 2. How to Configure and Enable Routing and Remote Access on Server 2016.
The next step is to enable and configure the VPN access on our Server 2016. To do that:
1.
Right click on the Server’s name and select
Configure and Enable Routing and Remote Access. *
* Note:
You can also launch Routing and Remote Access settings, by using the following way:
1. Open Server Manager and from
Tools
menu, select
Computer Management.
2. Expand
Services and Applications
3. Right click on
Routing and Remote Access
and select
Configure and Enable Routing and Remote Access.

2.
Click
Next
at ‘Routing and Remote Access Server Setup Wizard’.

3.
Choose
Custom configuration
and click
Next.

4.
Select
VPN access
only in this case and click
Next.

5.
Finally click
Finish
. *
* Note
: If you receive an error says ” Remote Access Service in unable to enable Routing and Remote Access ports in Windows Firewall…”, ignore it and click
OK
to continue.

6.
When prompted to Start the service click
Start
.

Step 3. Configure VPN Server Settings (Security, IP Range, etc.)
1.
At
Routing and Remote access
panel, right click on your server’s name and select
Properties.

2a.
At ‘Security’ tab, select the
Windows Authentication
as the Authentication Provider. and then click the
Authentication Methods
button.

2b.
Make sure that the
Microsoft encrypted authentication version 2 (MS-CHAP v2)
is selected and then click
OK.

3a.
Now select the IPv4 tab,
choose
the
Static address pool
option and click
Add
.

3b.
Now type the IP Address Range that will be assigned to VPN clients and click
OK
twice to close all windows.
e.g. For this example we’re going to use the IP address range: 192.168.1.200 – 192.168.1.209.

Step 4. Allow Routing and Remote Access Inbound Traffic in Windows Firewall
1.
Go To
Control Panel
>
All Control Panel Items
>
Windows Firewall
.
2.
Click
Advanced settings
on the left.

3.
Select
Inbound Rules
on the left left.
4a.
At the right pane, double click at
Routing and Remote Access (PPTP-In)

4b.
At ‘General’ tab, choose
Enabled
,
Allow the connection
and click
OK
.

5a.
Then double click at
Routing and Remote Access (GRE-In).

5b.
At General tab, choose
Enabled
,
Allow the connection
and click
OK
.

6. Close
the Firewall settings and
restart
your server.
Step 5. How to Select which users will have VPN Access.
Now it’s time to specify which users will be able to connect to the VPN server (Dial-IN permissions).
1.
Open
Server Manager
.
2.
From
Tools
menu, select
Active Directory Users and Computers
. *
* Note
: If your server doesn’t belong to a domain, then go to
Computer Management
->
Local Users and Groups
.

3.
Select
Users
and double click on the user that you want to allow the VPN Access.
4.
Select the
Dial-in
tab and select
Allow access
. Then click
OK
.

Step 6. How to Configure the Network Policy Server to Allow the Network Access.
In order to allow the VPN users to access the network through the VPN connection, proceed and modify the Network Policy Server as follows:

2.
Under the
NPS (Local)
select
Network Policies on the left.
3a.
Double click at
Connections to Microsoft Routing and Remote Access server
policy.

3b.
At the ‘Overview’ tab, select the following settings and click
OK
:
-
-
Grant access: If the connection request matches this policy.
-
Remote Access Server (VPN-Dial up)
-

4a.
Now open the
Connections to other access servers
policy, select the same settings and click
OK.
-
-
Grant access: If the connection request matches this
policy.
-
Remote Access Server (VPN-Dial
up)
-

5. Close the Network Policy Server settings.

Step 7. How to Configure Firewall to Allow PPTP VPN Access (Port Forwarding).
The next step is allow the PPTP VPN connections on your ISP’s Router/Firewall.
1. At the top of our browser type your router’s IP address: (e.g. “http://192.168.1.1” in this example) and login to router’s web interface.
2. Inside the Router configuration setup, forward the port 1723 to the IP address of the VPN Server. (See your Router’s manual on how to configure Port Forward). *
- For example, if your VPN Server has the IP address “192.168.1.8” then you have to forward the port 1723 to the IP “192.168.1.8”.

Step 8. How to Setup the PPTP VPN Connection on CLIENTS *
* Notes & Additional Help:
1. In order to be able to connect to your VPN server from a distance you have to know the public IP Address of the VPN server. To find the pubic IP Address navigate to this link:
http://www.whatismyip.com/
(from VPN Server 2016)
.
2. To ensure that you can always connect to your VPN server it is better to have a Static Public IP Address. To obtain a Static Public IP Address you must contact your internet service provider. If you don’t want to pay for a static IP Address, then you can setup a free Dynamic DNS service (e.g.
no-ip
.)
on your router’s (VPN Server) side.
To setup a PPTP VPN Connection on Windows 10:
1.
From
Settings

click
Network and Internet
, OR,
right click
at the
Network
icon on the taskbar and choose
Open Network & Internet settings
.

2.
Click VPN on the left and then click
+
to Add a VPN connection.

3.
At the next screen, fill out the following information and click
Save
:
a.
VPN provider
: Select
Windows (built-in).
b.
Connection name
: Type a friendly name for the VPN connection. (e.g.. “VPN_OFFICE”)c.
Server name or address
: Type the VPN’s server host name or the public IP address or the VPN server.d.
VPN Type
: Use the drop down arrow to select the type of the VPN connection that your company uses. {e.g. “Point to Point Tunneling Protocol (PPTP)”}.e.
Type of sign-in info
: Use the drop down arrow and select the authentication type for the VPN connection. (e.g. “User name and password”).f.
User Name
: Type the VPN user name.g.
Password
: Type the VPN password.h.
Check
the “Remember my sign-in info” checkbox, if you want to save your sign-in credentials for the VPN connection and then click
Save

4.
Under
Related settings
, choose
Change adapter options
.

5.
Right click
on the
VPN connection
and choose
Properties
.

6.
At
Security
Tab, select
Allow these protocols,
and check the following protocols:
-
-
Challenge Handshake Authentication Protocol (CHAP)
-
Microsoft CHAP Version 2 (MS-SHAP v2)
-

7.
At
Networking
tab, select the
Internet Protocol Version 4 (TCP/IPv4)
and click
Properties
.

7a.
Click
Advanced
.

7b.
Uncheck
the ”
Use default gateway on remote network
” and click
OK
three (3) times to apply changes and close all windows.

8.
Now you’re ready to connect to your VPN Server 2016.

That’s it! Let me know if this guide has helped you by leaving your comment about your experience. Please like and share this guide to help others.
Even $1 can a make a huge difference for us
in our effort to continue to help others while keeping this site free:

constantly protected
from malware threats,
existing and future ones
, we recommend that you install
Malwarebytes Anti-Malware PRO
by clicking below (we
do earn a commision from sales generated from this link, but at no additional cost to you. We have experience with this software and we recommend it because it is helpful and useful):