This tutorial contains instructions on how to upgrade Windows 11 v21H2 to v22H2, on a PC that does not meet the Windows 11 system requirements.
If you’ve already installed Windows 11 on a computer with unsupported hardware, you may have noticed that the latest version 22H2 of Windows 11 doesn’t show up in Windows Update so you can install it.
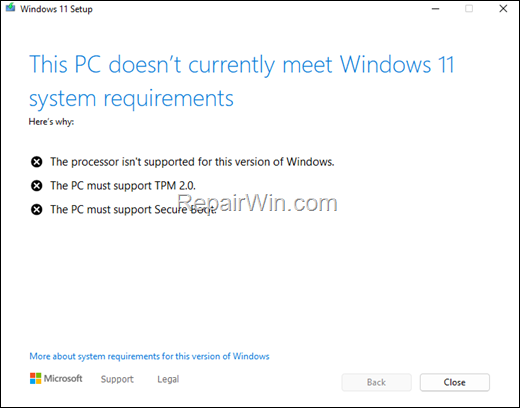
This is because when you run Windows 11 on a computer whose processor is not supported by Windows 11, or does not have TPM 2.0 or Secure Boot, the Windows 11 22H2 update not showing in Windows Update.
In such a case, you cannot upgrade Windows 11 to version 22h2 even using a Windows 11 ISO file because you will get the error “Your computer does not currently meet the Windows 11 system requirements.

How to Update Windows 11 to the latest version on a PC without TPM, Secure Boot or Supported processor.
Notes:
1. Below you’ll find detailed instructions on how to upgrade Windows 11 21H2 to 22H2, by replacing the Windows 11 appraiserres.dll file with the Windows 10 appraiserres.dll file. In my opinion, this is the safest way to install the latest version of Windows 11 on your system without having to modify the registry or use more complicated methods.
2. The method was tested in December 2022.
Step 1. Download Windows 11 ISO file.*
* Note: If you have already downloaded the latest version of Windows 11 in a ISO file, skip to next step.
1. Navigate to Windows 11 download page and download the Windows 11 Media Creation Tool.
2. Run the downloaded file and when prompted Accept the license terms.
3. At Windows 11 edition and language options, click Next.

4. Choose ISO File and click Next.

4. Save the file as Windows11.ISO file to your disk.

Step 2. Download Windows 10 ISO file.
1. From the Windows 10 Download page download the Windows 10 Media Creation Tool. (Click Download Now under Create Installation Media).
2. Run the downloaded file and when prompted Accept the license terms.
3. Choose Create installation media (USB flash drive, DVD, ISO) for another PC and click Next

4. At Windows 10 edition and language options, click Next.

5. Choose ISO File and click Next.

5. Save the file as Windows10.ISO file to your disk.

Step 3. Extract the Windows 11 & Windows 10 ISO files.
1. Right-click on the Windows 11.iso file and extract the ISO file to a folder (In you own WinRAR, select Extract to “Windows11”) *
* Note: If you haven’t an archiver program installed, then download and install WinRAR or the 7-ZIP

2. Then, right-click on the Windows 10.iso and extrat the ISO file to a folder. (Extract to “Windows10”)
Step 4. Replace APPRAISERRES.DLL file in Windows 11 folder.
1. Explore the contents of the Windows 11 folder and open the sources folder.
2. Find and delete or rename the appraiserres.dll file to appraiserres_OLD.dll

3. Now explore the contents of “Windows10sources” folder, find the appraiserres.dll file and copy it to “Windows11sources” folder.

Step 5. Run Disk Cleanup.
Now proceed and remove all the Windows Update files with Disk Cleanup.
1. Press Windows ![]() + R keys to open the run command box.
+ R keys to open the run command box.
2. Type cleanmgr & press Enter.

3. In ‘Disk Cleanup for (C:)’ window, click Clean up system files.

4. At the next window check the following boxes and click OK:
- Windows Update Cleanup
- Window upgrade log files
- Delivery Optimization files
- Temporary Internet Files.
- Temporary Windows Installation files.

5. When the cleanup is complete, proceed to next step.
Step 6. Disconnect from Internet. (IMPORTANT)
Disable or Disconnect your Network connection.
Step 7. Install – Upgrade Windows 11 to version 22H2 on Unsupported Hardware. *
* Suggestion: Before proceeding with the installation of Windows 11, proceed to back up your personal files to an external USB drive, so that you have a copy of your important files in case something goes wrong and you need to do a clean install of Windows 11.
1. Navigate to Windows11 folder and run the setup.exe application.

2. Click Next to Install Windows 11.
3. Wait until Windows 11 setup checking your PC and for Updates.
4. When prompted Accept the License terms.
5. Finally click Install to install Windows 11 while keeping your personal files and apps.

5. The Windows 11 installation will start. Wait it to complete. (During the process your computer will restart several times)

6. If all goes well, after 20-30 minutes you should have successfully updated your PC to Windows 11 22H2.

That’s all folks! Please leave a comment in the comment section below or even better: like and share this blog post in the social networks to help spread the word about this solution.
