,
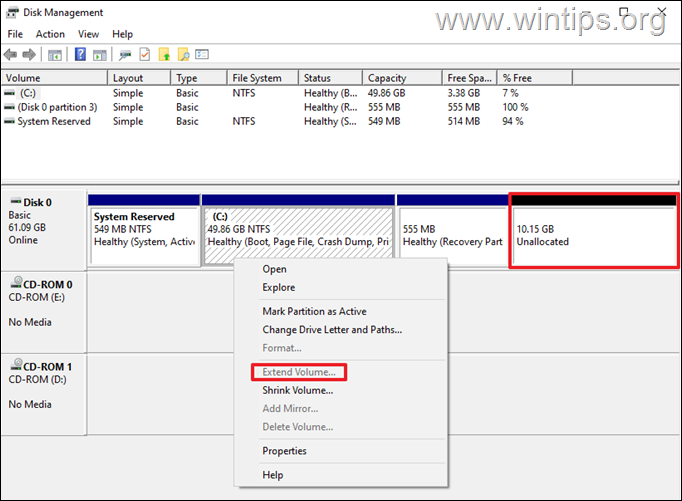
If the “Extend Volume” option in Windows Disk Management is greyed out and you cannot add the Unallocated space on Drive C: to extend its size, continue reading below to fix the problem.
After migrating/cloning a hard drive to a larger one, you may find in Windows that the total space on the C: drive is smaller in size than the actual size of the new drive you have installed.
This is because when you clone a hard drive to a larger one, the cloning software creates partitions that match the size of the source drive, leaving the extra space as unallocated.
But this creates the following problem: The extra (Unallocated) space cannot be allocated on the C: drive (the “Extend Volume” option is grayed out), because is “placed” at the “end” of the disk (after the “Recovery” partition), and as a result of that, you cannot increase the size of Disk C:.*
* Info: In order to be able to increase (expand) the size of a drive/volume, the “Unallocated” space must be located right after of the drive/volume you want to extend, and no other volumes must be interspersed between them (such as in this case the “Recovery” partition). In other words, the Unallocated space must be contiguous with the partition you want to add it to.
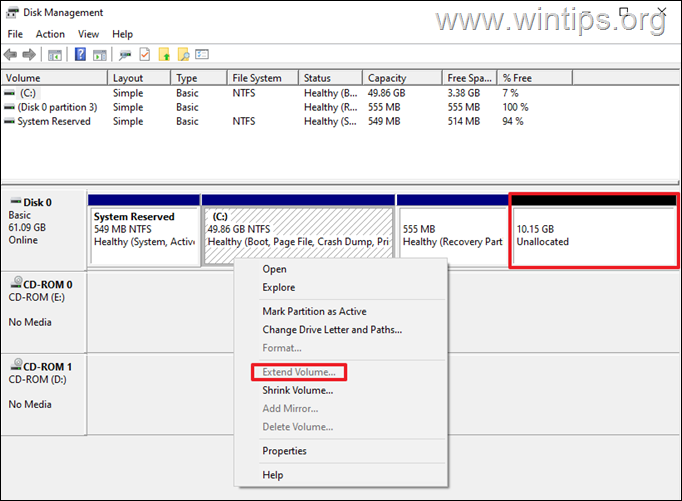
How to Add Unallocated Space to Disk C when the “Extend Volume” option is Greyed Out on Windows 10/11.
As you can understand from the above, the only ways to fix the mentioned problem is to either delete the partition between the C: drive and the “Unallocated space” (in this case the “Recovery Partition”), or to move the “Unallocated” space next to the C: drive.
Method 1. Delete the Recovery Partition and then Extend drive C:
Because unfortunately, Windows does not offer the feature to move the “Unallocated” space to another position on Disk, the only way to fix this problem without using a third party software (see Method-2), is to delete the Recovery partition.*
* Info: The Recovery partition in Windows 10/11 is a hidden volume that contains essentials tools to troubleshoot and fix issues that may occur with your operating system. More specifically, the “Recovery” partition contains the Windows Recovery Environment (WinRE) tools that allows you to repair your computer, without the need of an external recovery media. (e.g. a Windows Installation USB disk).
Step 1. Delete the Recovery Partition Using DISKPART.*
* Important: In most cases, it is not recommended to delete the Recovery partition on your Windows PC unless you have a specific and good reason to do so, like in this case.
Deleting the Recovery Partition does not affect the operation of Windows at all, but in case you have a problem with Windows in the future, you will not be able to boot to WinRE (Windows Recovery Environment) to repair your system without using a USB installation Windows media, or without re-creating the Recovery Partition after extending the volume.
PRECAUTIONS:
Before proceeding to delete the Recovery partition, is recommended to take the following precautions:
-
Create a Windows Installation Media: As mentioned above, after deleting the Recovery partition, you’ll not be able to repair your system if needed, without using a Windows Installation media. So, as a precaution, create a USB installation media and have it available to repair your system in the future if needed.
-
Backup your Files: Follow the below steps carefully, otherwise you may lose your data. To avoid problems, is recommended to backup your important files to an external USB disk, or to follow the steps in Method-2 below to move the Recovery partition to another position on disk, using a third party program.
To delete the Recovery Partition:
1. On the search area type CMD and select Run as administrator to open command Prompt with admin privileges.

2. In Command prompt, give the following commands in order (press Enter after typing each command).
-
select disk 0
-
list partition
3. Now notice the partition number of the Recovery partition. (eg. “3” in this example)

4. Then give the following command to select the Recovery partition, using its partition number.*
-
select partition number
* Note: Replace the partition number, according your case. In this example the command is:
-
select partition 3
5. Finally, delete the Recovery partition with this command:
-
delete partition override
6. When the command is executed, type exit and close command prompt.

Step 2. Extend Volume C: in Disk Management.
![]() + R keys to open the ‘Run‘ command box.
+ R keys to open the ‘Run‘ command box.
2. In run command box, type diskmgmt.msc and press Enter to open Disk Management.

3. In Disk Management, right-click on Disk/Volume C: and select Extend Volume.

4. Click Next at first screen of the “Extend Volume Wizard” and then press Next again to to allocate all the available unallocated space on drive C:. Then click Finish.

5. That’s it! You have successfully expanded the space of C: drive. *
* Note: If you want to re-create a Recovery Partition on your system, follow the instructions on this article: How to Create a Recovery Partition on Windows 10/11.

Method 2. Move Unallocated Space to Another Position on Disk.
The second method to fix the mentioned problem, is to use a “Partition Manager” program to move the Recovery partition at the end of the disk and the Unallocated space right after the C: drive.
For this task, you can use a Free Partition Manager program, like the MiniTool Partition Wizard, AOMEI Partition Assistant Standard, EaseUS Partition Master – Free, etc.*
* Note: In this guide, we use the AOMEI Partition Assistant Standard to change the location of the Recovery partition on the disk.
1. Download and install the AOMEI Partition Assistant Standard Edition.
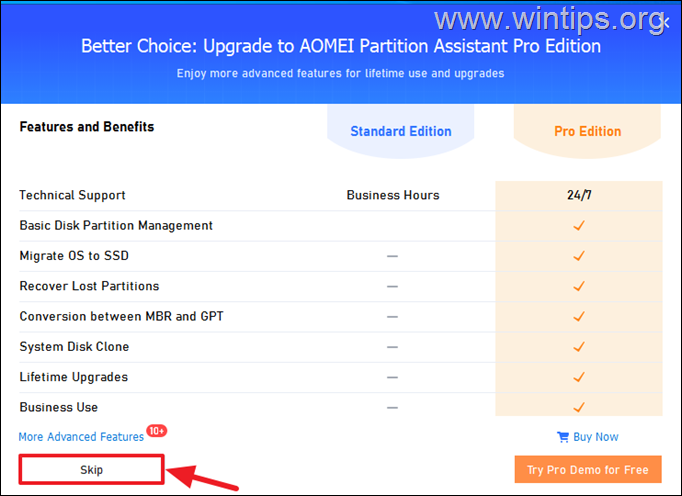
2. After installation open AOMEI Partition Assistant.
3. Select the Recovery Partition and from the right-pane select Resize/Move Partition. (or right-click at the Recovery partition and choose Resize/Move Partition)
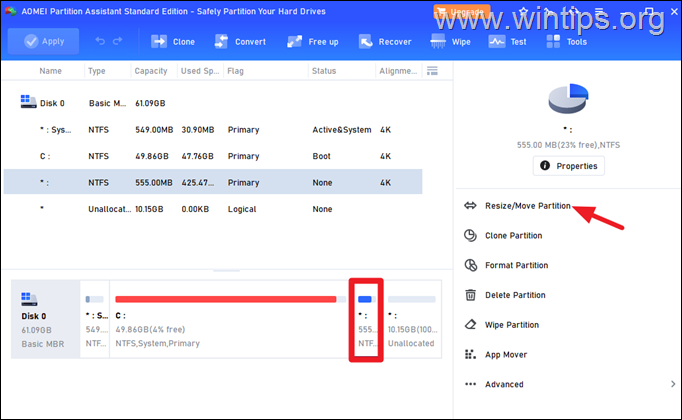
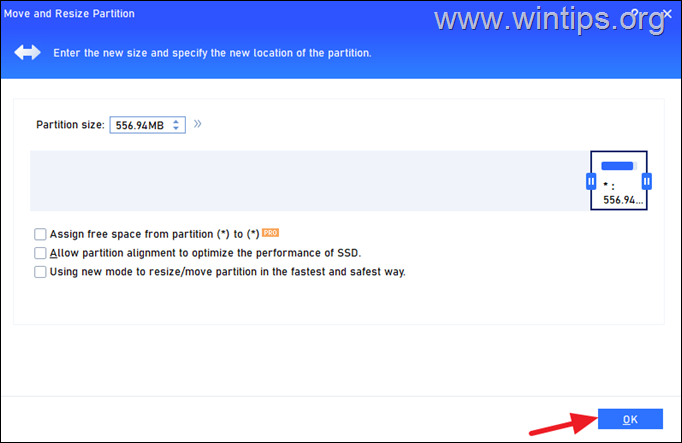
4. Now click and drag the recovery partition to the far right.
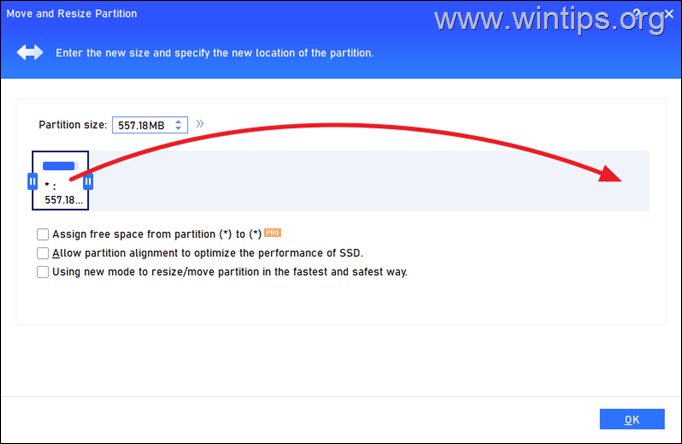
5. When done, click OK.
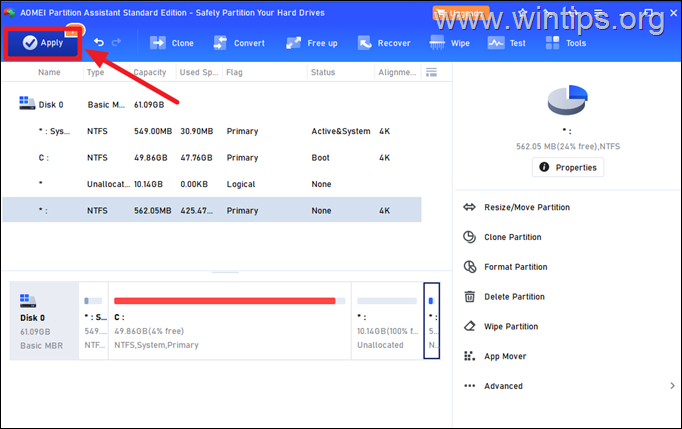
6. Now click Apply on the top left to apply the change.
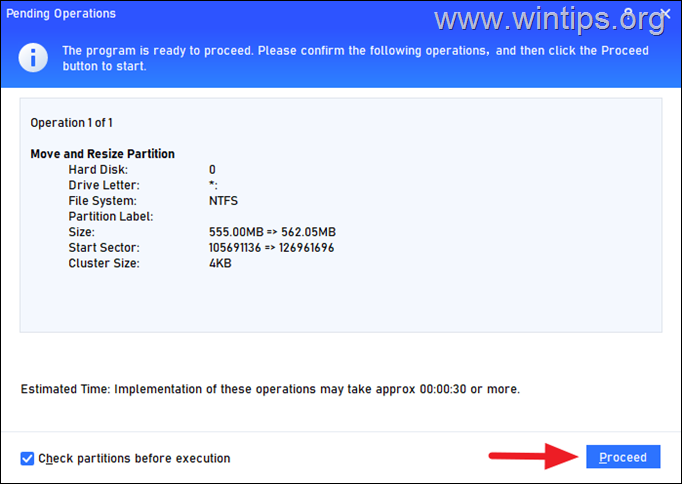
7. Click Proceed at the next screen and then Yes to start the operation.
8. Wait a few seconds for operation to complete and when this done click the OK.
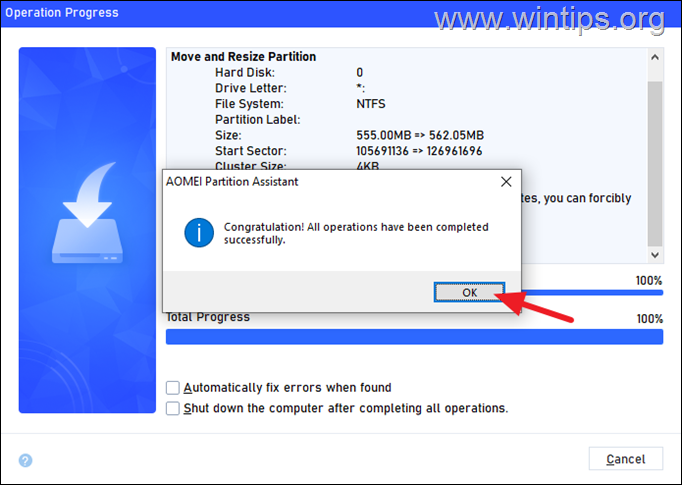
9. Now you can proceed to expand the size of disk C: either from the Windows Disk Management (see step-2 on method-1 above), or from here, in AOMEI Partition Assistant Standard, as instructed below.
10. Select the drive C: and select Resize/Move Partition.
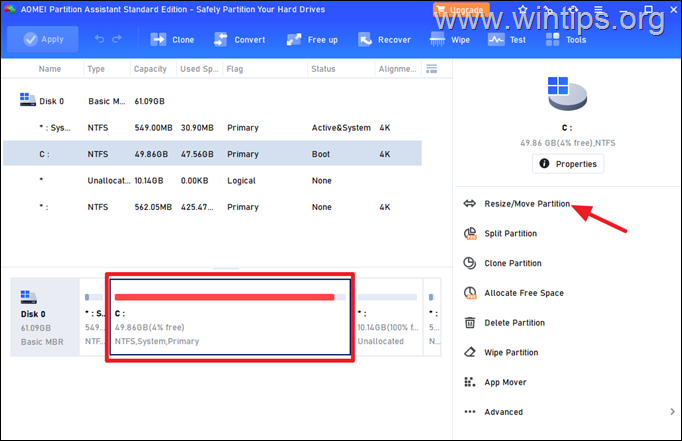
![]() symbol and then click and drag it to the right to select all the unallocated space.
symbol and then click and drag it to the right to select all the unallocated space.
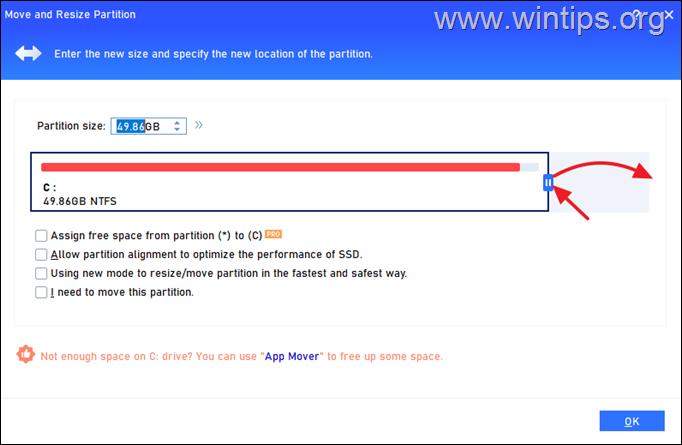
12. When done, click OK.
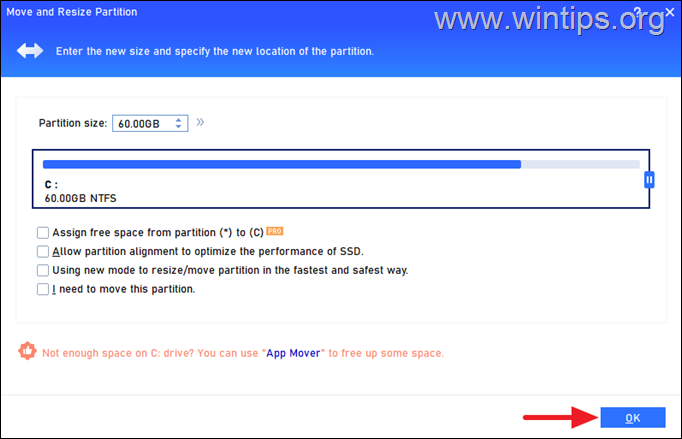
13. Now, click Apply and then Proceed to apply the change. Then, click Yes to start the operation and when is completed click OK.
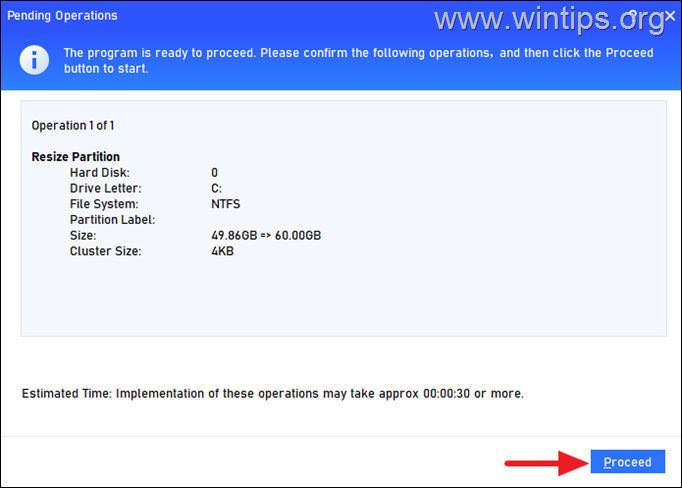
14. Click Yes to start the operation and when is completed click OK.
15. That’s it! Close the AOMEI Partition Assistant and you’re done!
That’s it! Which method worked for you?
Let me know if this guide has helped you by leaving your comment about your experience. Please like and share this guide to help others.
